
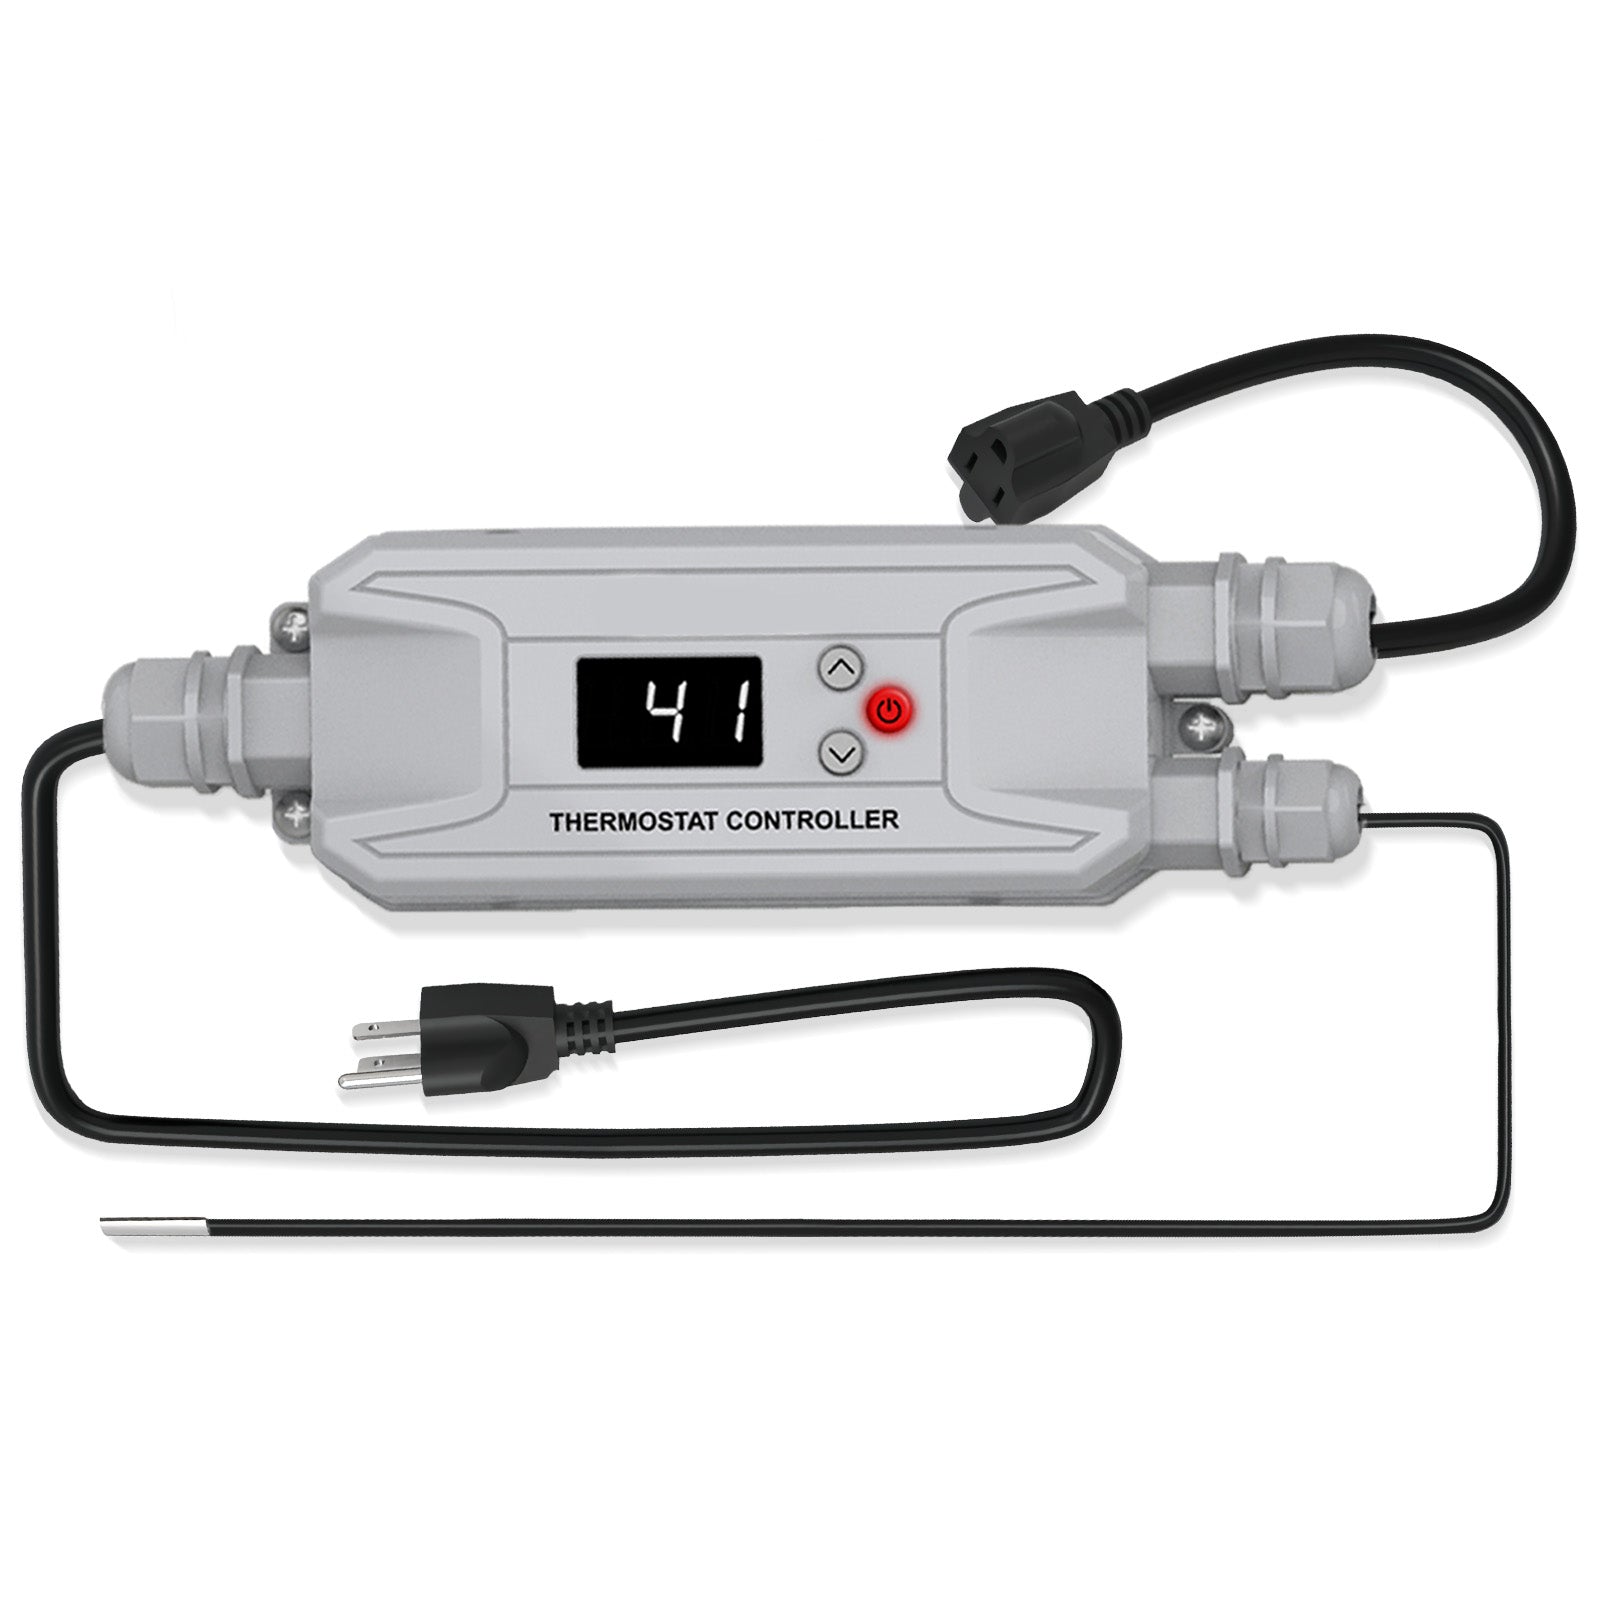

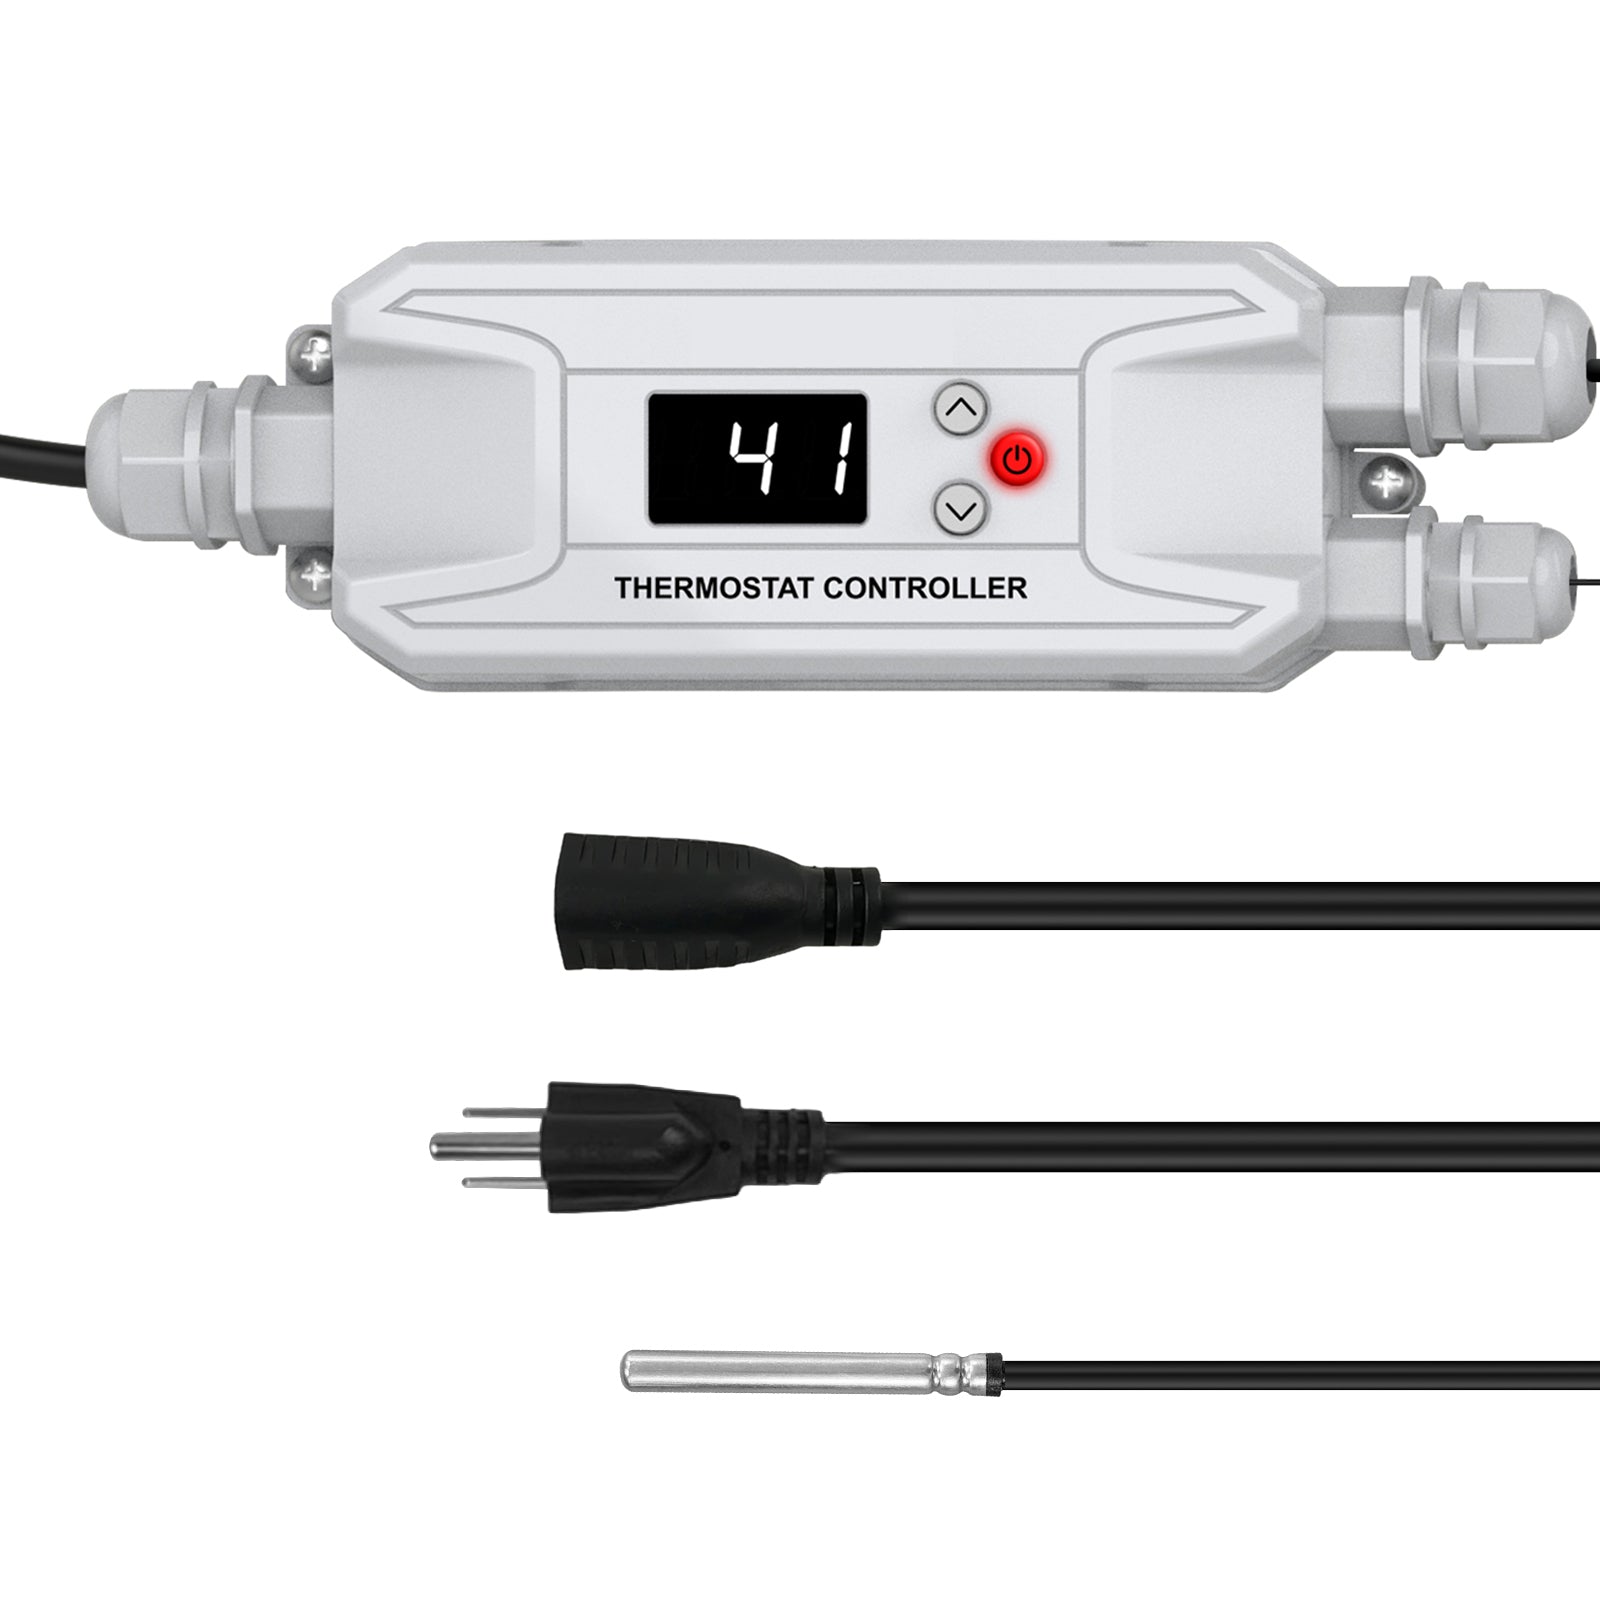

MAXKOSKO Pipe Heat Tape Thermostat Controller, 120V/240V, 15 ft Sensor
2 in stock
Couldn't load pickup availability
Payment Reminder
- Our website accepts Visa, MasterCard, and American Express. If you are using a card issued by another bank, please ensure it is enabled for international transactions.
- During payment, you may be required to complete 3D Secure (3DS) verification. Please ensure that the cardholder completes the verification to avoid payment failure.
- If your usual spending amounts are relatively low and you are making a larger purchase, your bank may flag the transaction as a potential risk. If your payment fails, please contact your bank to approve the transaction.


Description
Pipe Heat Tape Thermostat Controller — 120V / 240V
Automatic temperature control for compatible external and in-pipe heating cable systems.
- Choose 120V plug-in or 208–240V hardwired.
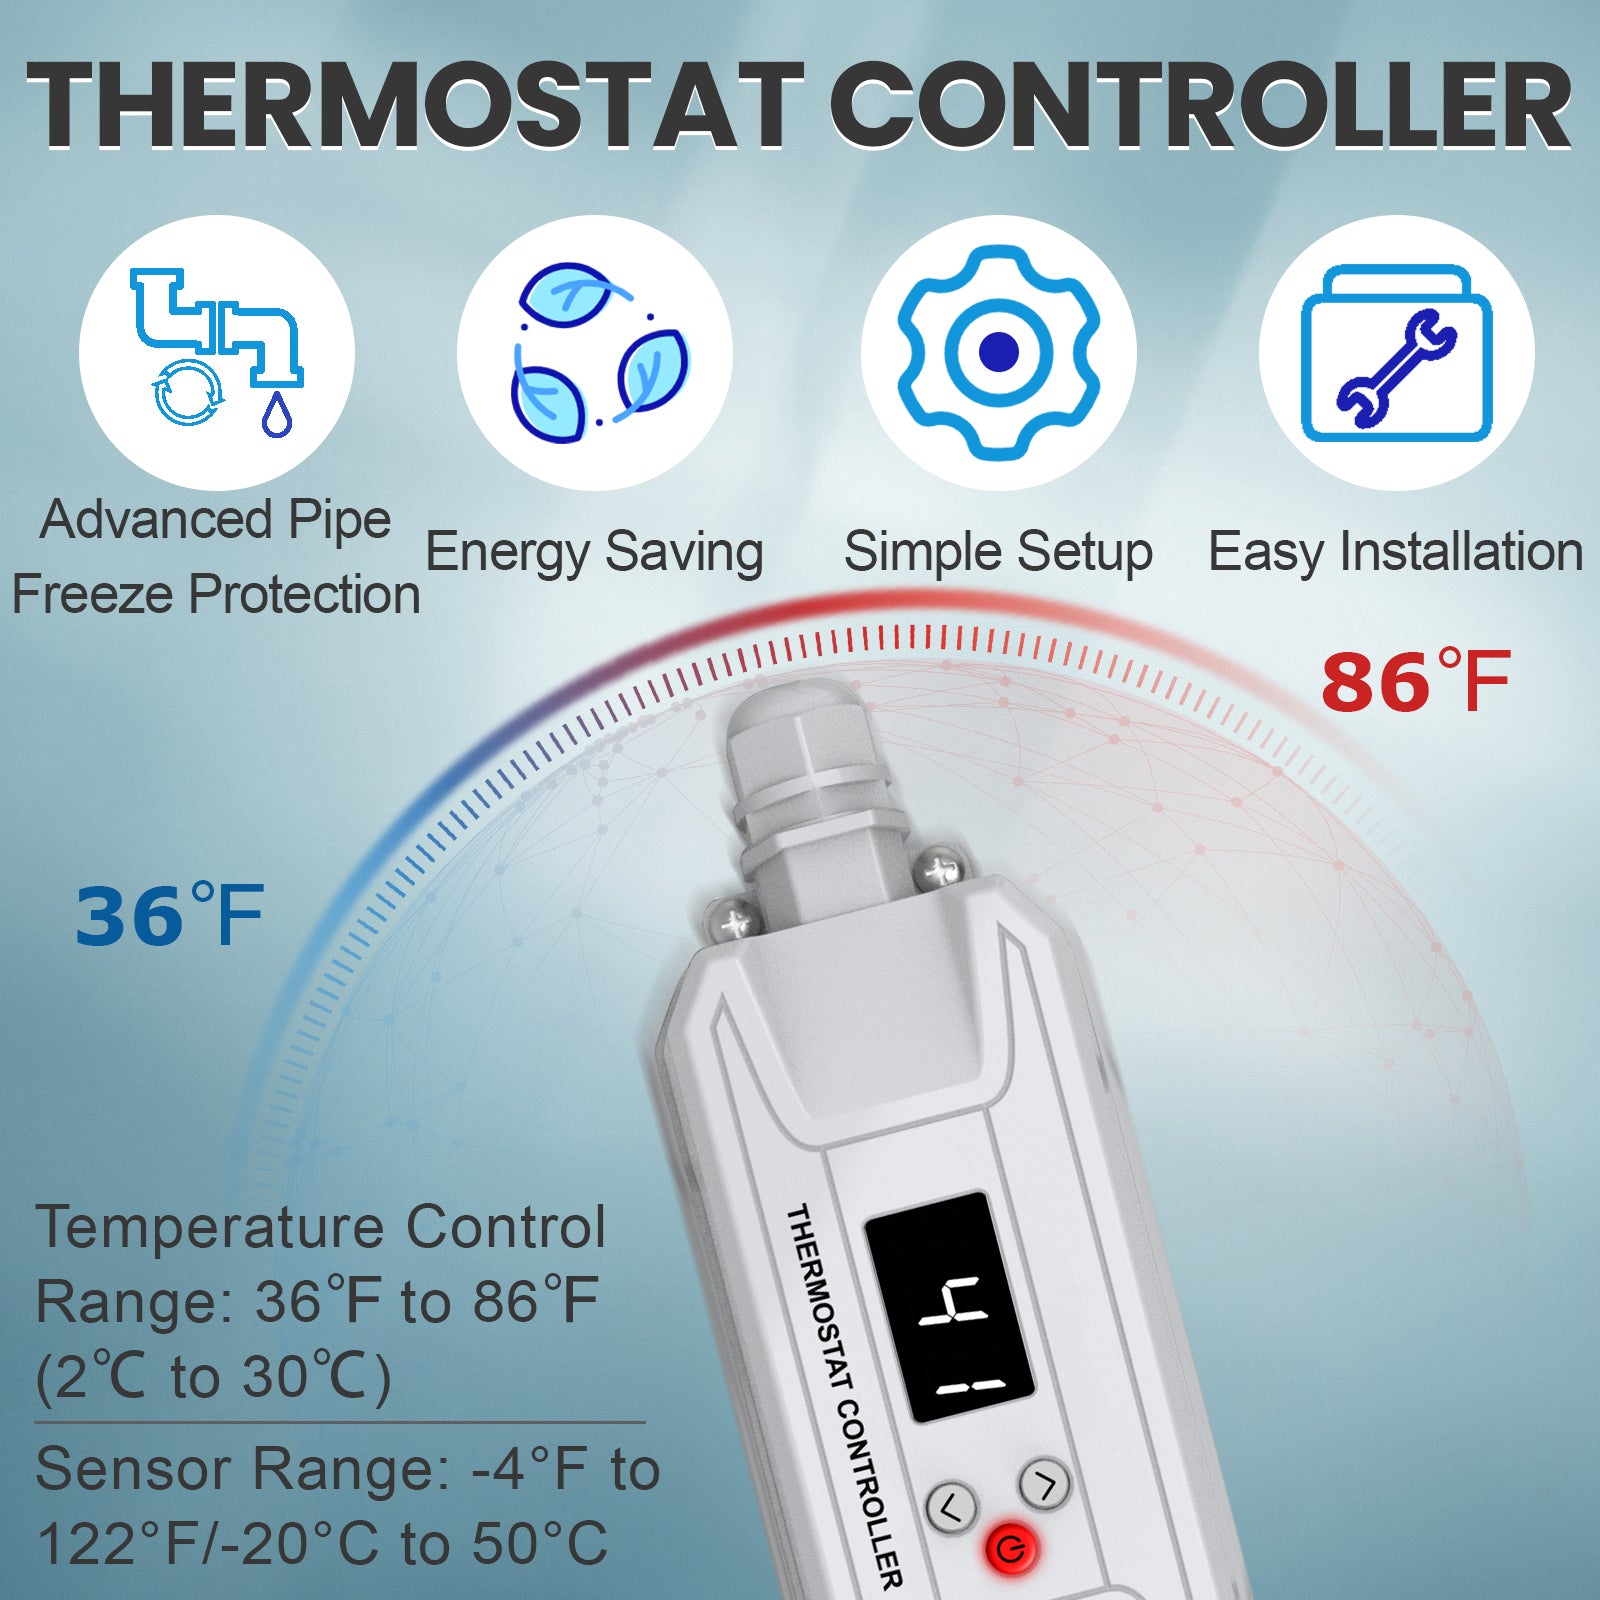
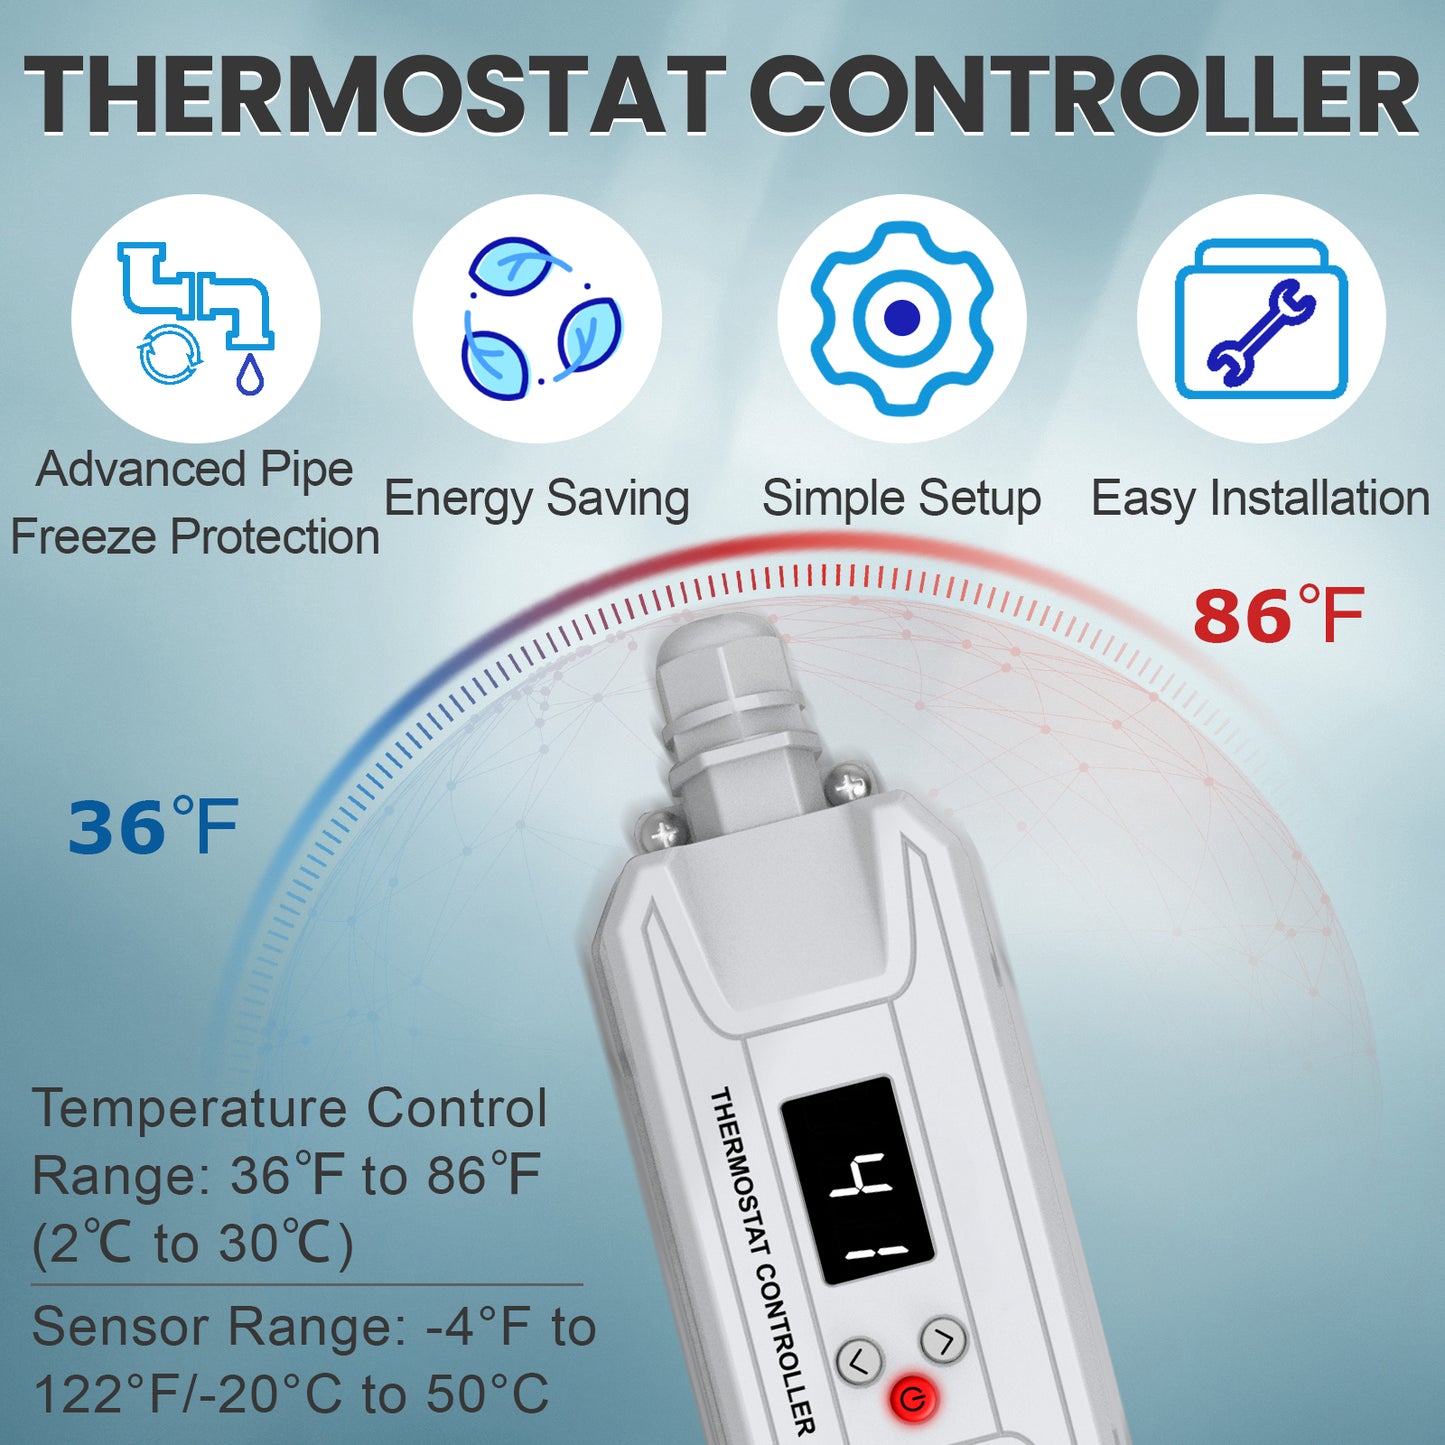
- Adjustable from 36°F to 86°F (2°C to 30°C).
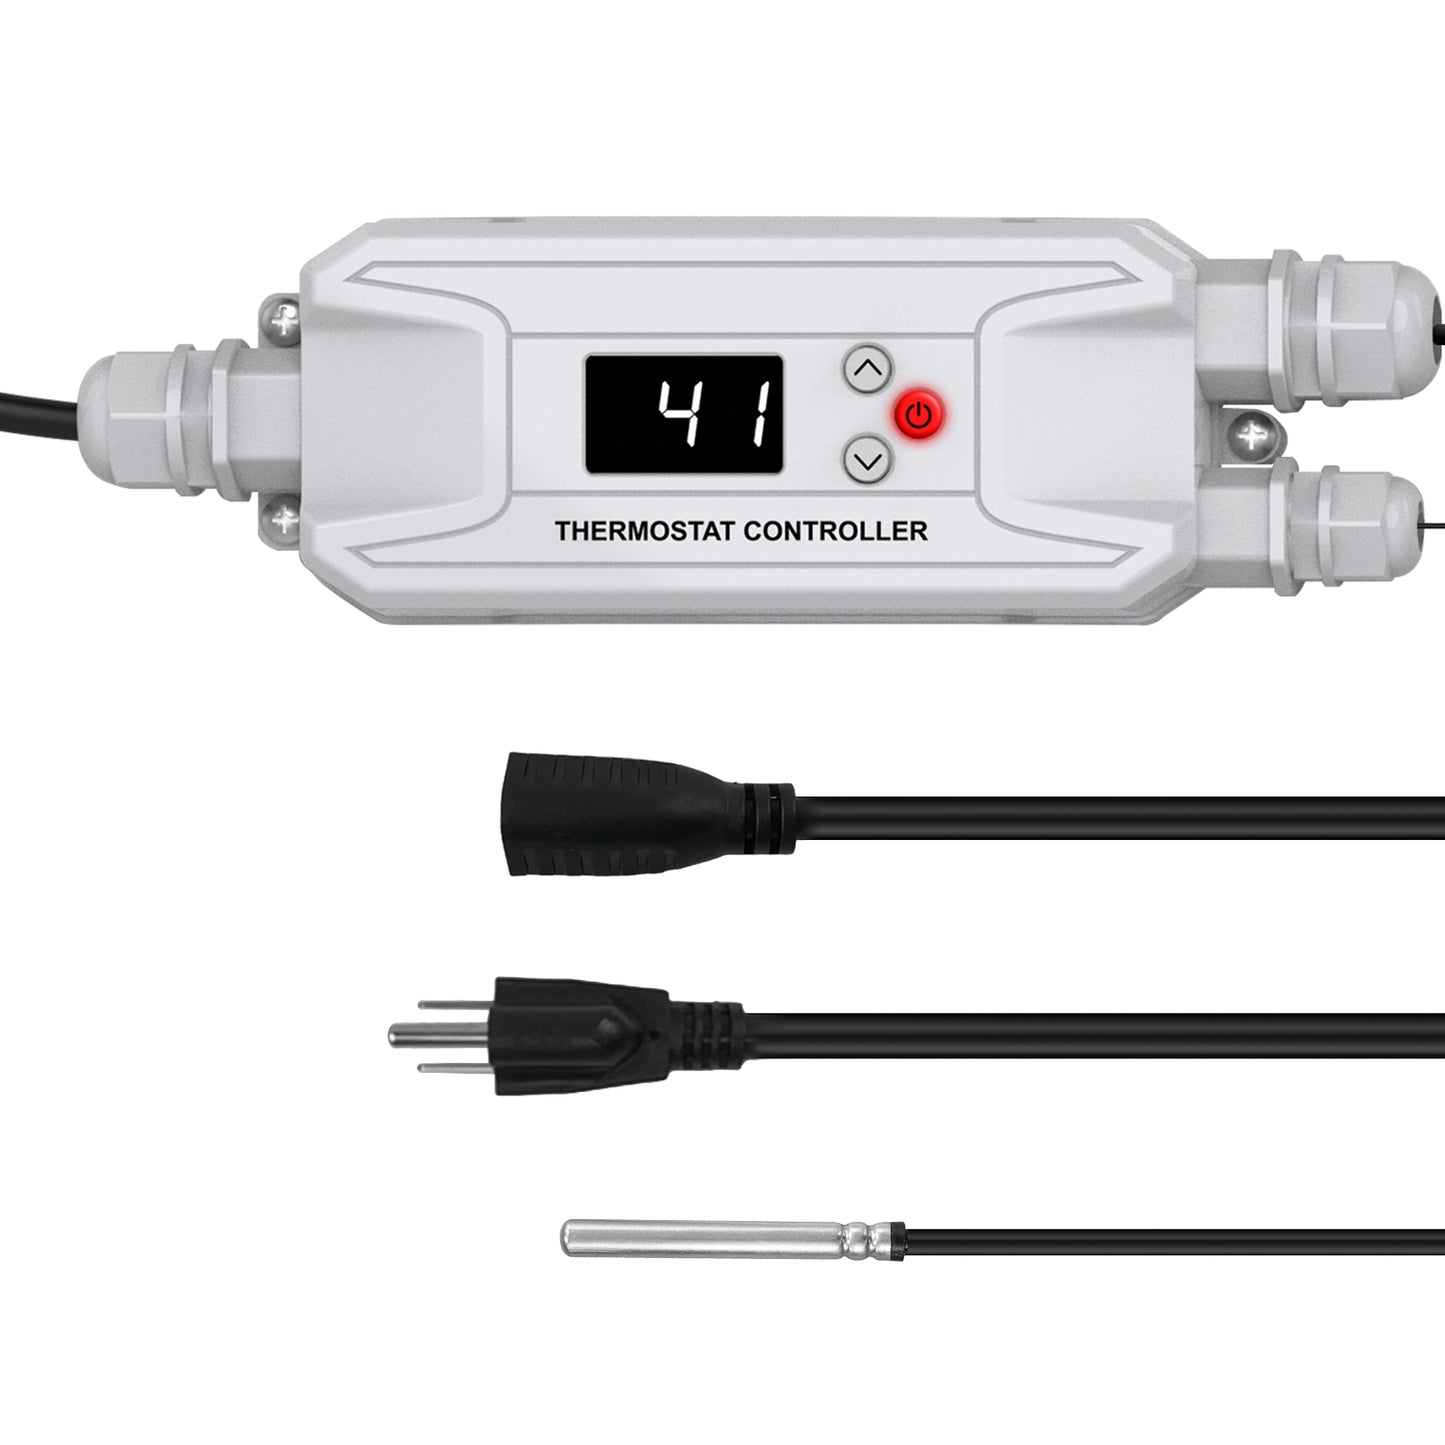
- 15 ft remote sensor measures the pipe temperature.
- Maximum load: 15A.
- Heating cable is sold separately.
Two Voltage Options
120V plug-in for simple installation. 208–240V hardwired for compatible higher-voltage systems.
15 ft Remote Sensor
Place the sensor against the protected pipe for pipe-surface temperature control.
Adjustable Temperature
Select a temperature from 36°F to 86°F (2°C to 30°C).
15A Maximum Load
Up to 1800W at 120V, 3120W at 208V, or 3600W at 240V.
Automatic Operation
Switches power according to the temperature detected by the remote sensor.
Power-Outage Memory
Retains the previous power status and temperature setting after power is restored.
Important Before Ordering
Choose the Correct Voltage and Connection Type
- Controller Only: Heating cable is sold separately.
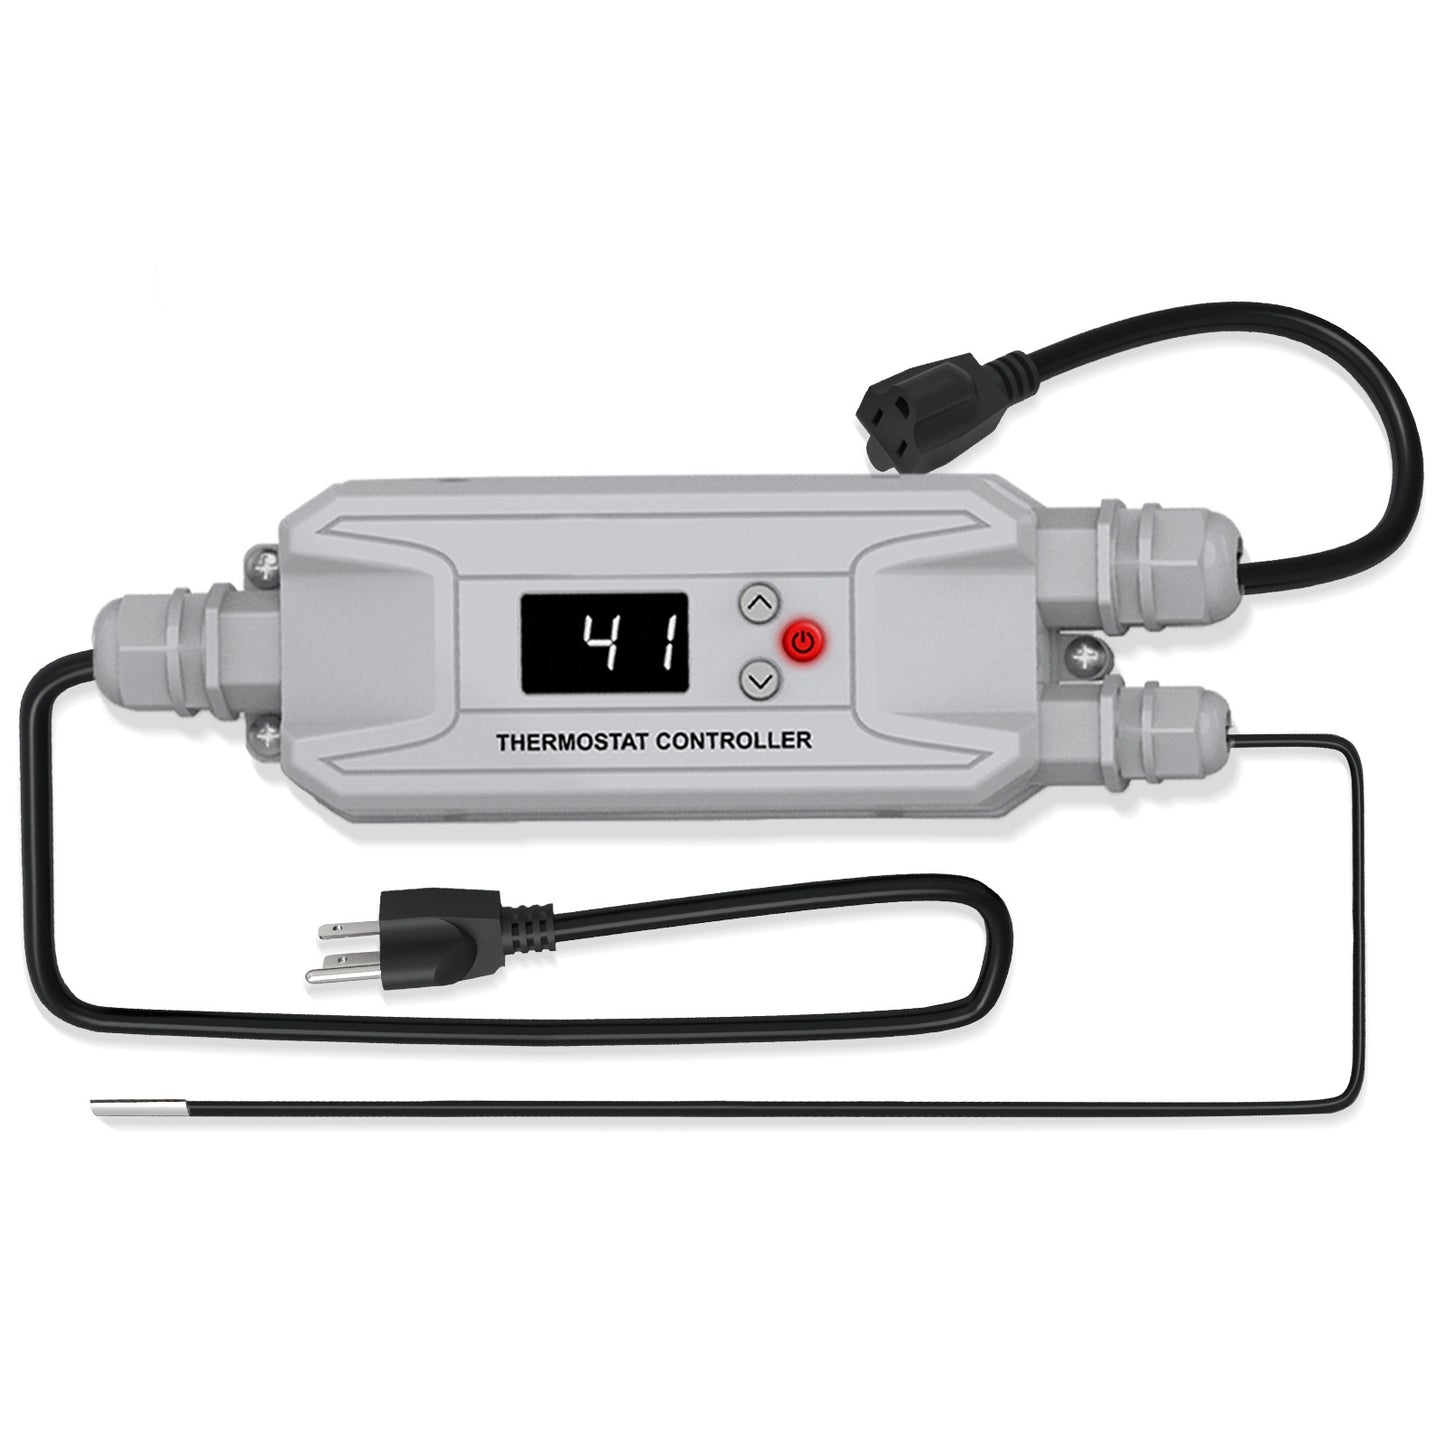
- 120V Plug-In: Includes a grounded input plug and a plug-in output receptacle.
- 208–240V Hardwired: Does not include a direct power plug or output receptacle.
- Maximum Load: 15A for both voltage options.
- Voltage Must Match: The controller, heating cable, and power supply must use the same system voltage.
- Professional Installation: The 208–240V version requires field termination by a qualified electrician.
- Hardwired Connections: Use L1, L2, and Equipment Ground. No Neutral connection is used.
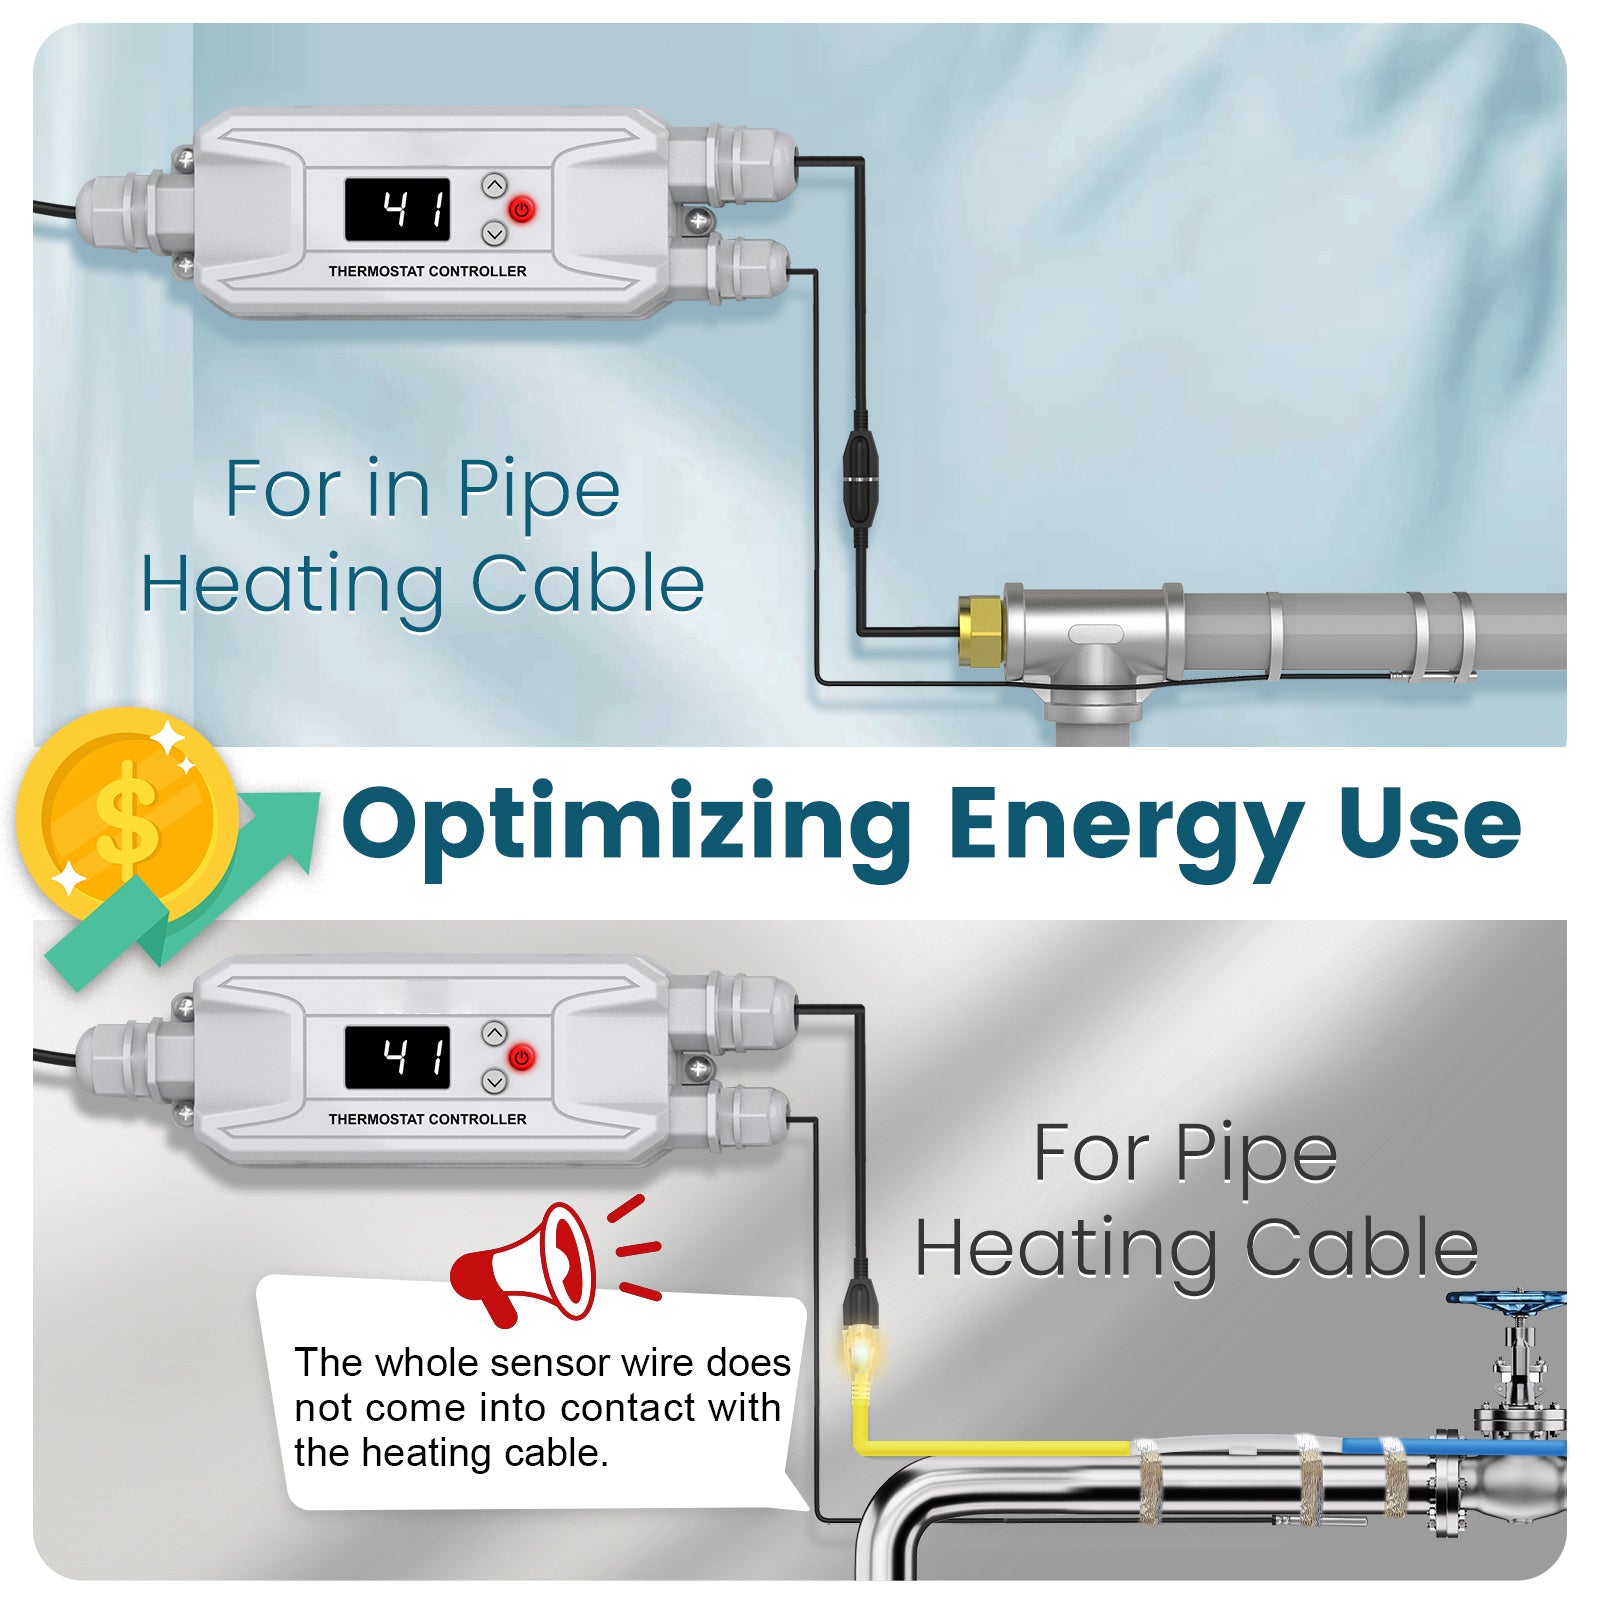
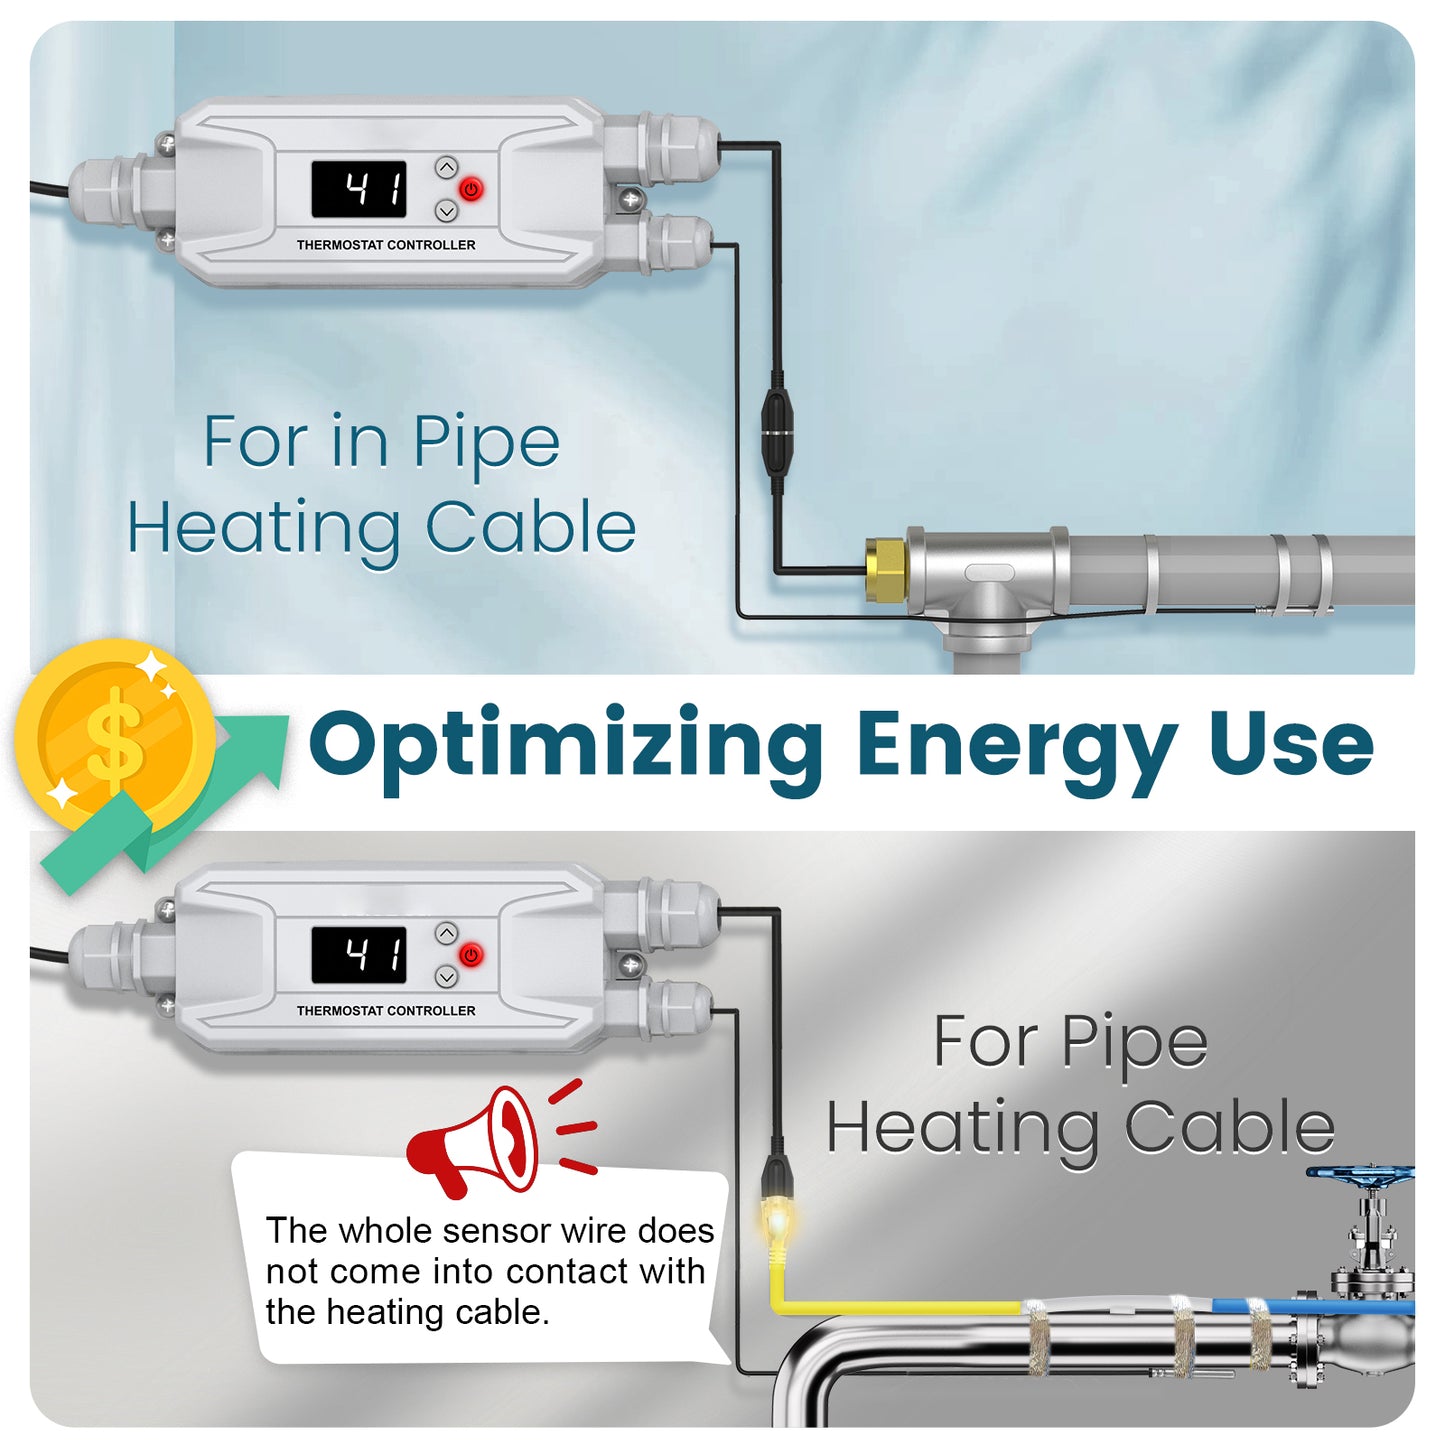
- Sensor Placement: Secure the sensor against the pipe. Do not place it directly against the heating cable.
- Best for Non-Thermostatic Cable: If the heating cable has its own thermostat, both controls must call for heat before the cable operates.
- Ordinary Locations Only: Do not install near gasoline, paint, flammable liquids, or explosive vapors.
Specifications
| Specification | 120V Plug-In | 208–240V Hardwired |
| Product Type | Pipe Heat Tape Thermostat Controller | Pipe Heat Tape Thermostat Controller |
| Rated Voltage | 110–120V AC | 208–240V AC |
| Maximum Current | 15A | 15A |
| Maximum Power | 1800W at 120V | 3120W at 208V / 3600W at 240V |
| Power Input | Three-prong grounded plug | Hardwired input leads; no direct plug |
| Heating Output | Plug-in output receptacle | Hardwired output leads |
| Power Lead Length | 3 ft | 6 ft |
| Installation Type | Plug-in | Professional hardwired installation |
| Temperature Setting Range | 36°F to 86°F (2°C to 30°C) | |
| Sensor Detection Range | -4°F to 122°F (-20°C to 50°C) | |
| Default Setting | 41°F (5°C) | |
| Switching Differential | Approximately ±3.6°F (±2°C) | |
| Sensor Wire Length | 15 ft | |
| Temperature Display | Selectable °F or °C | |
| Primary Application | Pipe heating cable and heat tape temperature control | |
How the Temperature Control Works View Details Hide Details
The remote sensor measures the temperature at the protected pipe.
- The controller supplies power when the sensor temperature falls below the selected range.
- Power stops when the temperature rises above the selected range.
- The switching differential is approximately ±3.6°F (±2°C).
- At a 41°F setting, heating starts near 37°F and stops near 45°F.
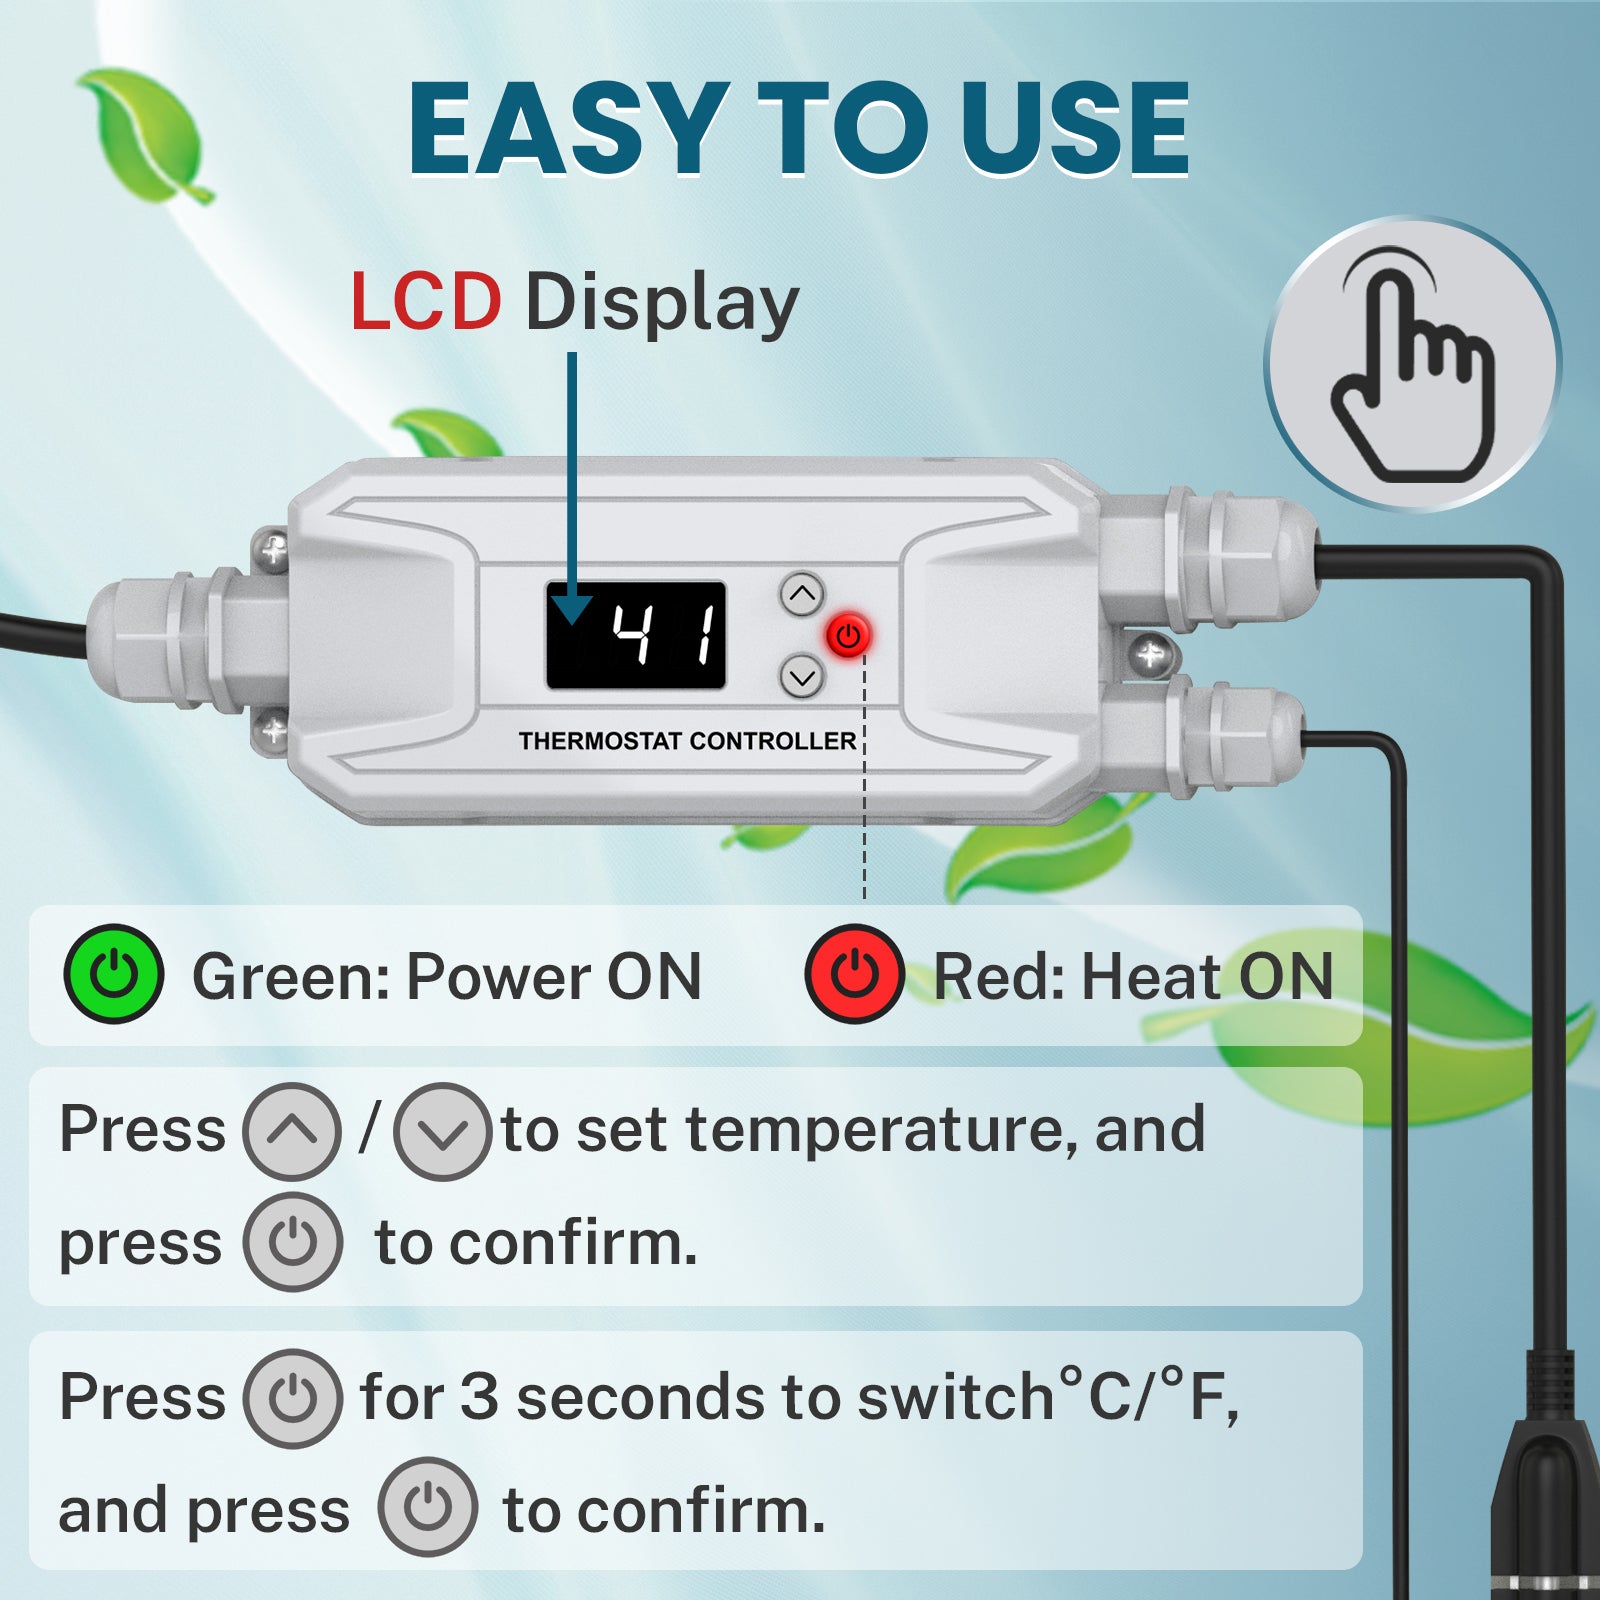
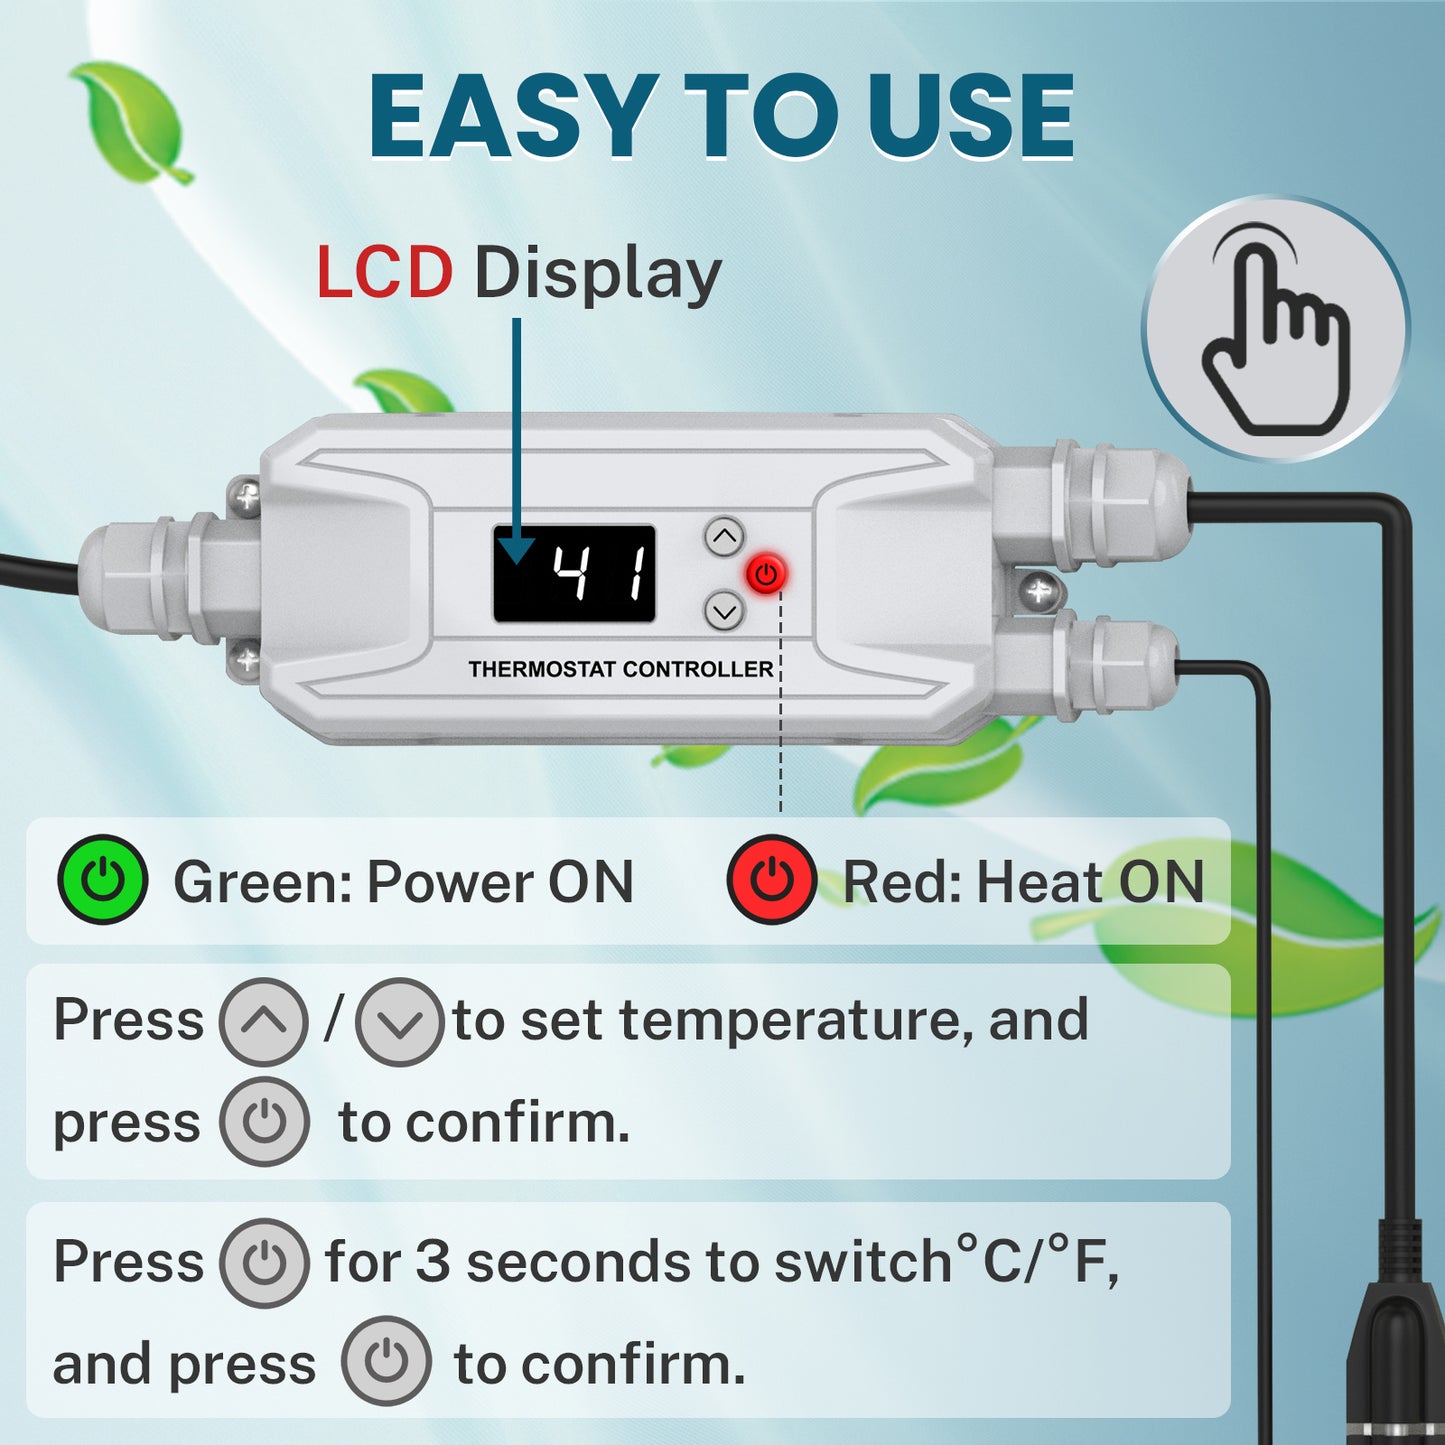
Green Indicator
The controller is powered on.
Red Indicator
The connected heating cable is receiving power.
Temperature Adjustment
Use the up and down buttons to change the setting.
°F / °C Selection
Press and hold the down button for about three seconds.
Basic Installation Overview View Steps Hide Steps
Install the heating cable before connecting it to the controller.
1. Install the Heating Cable
Follow the heating cable manufacturer’s instructions.
2. Position the Sensor
Secure the sensor against the protected pipe with suitable aluminum foil tape.
3. Add Pipe Insulation
Complete the required insulation without trapping the sensor against the heating cable.
4. Connect the System
Use the correct procedure for the selected plug-in or hardwired version.
5. Set the Temperature
Select the required temperature and test the heating output.
120V Plug-In Version
- Confirm that the heating cable is rated for 110–120V.
- Confirm that the load does not exceed 15A or 1800W.
- Plug the heating cable into the controller outlet.
- Plug the controller into a properly grounded outlet.
- Follow applicable ground-fault protection requirements.
208–240V Hardwired Version
- Professional installation is required.
- Confirm the actual supply voltage before wiring.
- Match the controller and heating cable voltage.
- Connect L1, L2, and Equipment Ground.
- Do not connect a Neutral conductor to the controller.
- Terminate the input and output leads inside approved enclosures.
- Provide suitable branch-circuit and ground-fault protection.
- Do not restore power until all connections are enclosed and inspected.
Sensor Placement
- External Heat Tape: Place the sensor directly against the pipe surface.
- In-Pipe Cable: Keep the sensor on the outside bottom surface of the pipe.
- Avoid Cable Contact: Do not let the sensor touch the heating cable.
- Protect the Wire: Do not kink, crush, staple, or clamp the sensor wire.
Recommended Applications
- External pipe heating cable and heat tape
- Compatible in-pipe heating cable systems
- Residential water pipe freeze protection
- Basement and crawl-space pipes
- Garage, cabin, barn, and utility-room pipes
- Irrigation and light commercial water systems
Frequently Asked Questions
What is the difference between the two voltage options?
The 120V model is plug-in. The 208–240V model has no direct plug or output receptacle and requires professional hardwired installation.
Can I plug in the 208–240V controller?
No. Both the incoming power and heating-cable output require manual field termination.
What heating cable can I use?
Use a compatible heating cable with the same voltage as the selected controller. The total load must not exceed 15A.
Can it control a cable with a built-in thermostat?
Yes, but both thermostats must call for heat before the cable operates. It is usually best suited to heating cable without built-in temperature control.
Does it measure room temperature or pipe temperature?
It measures the temperature at the end of the 15 ft wired sensor. Place the sensor directly against the protected pipe.
Can the sensor touch the heating cable?
No. Direct contact may create an inaccurate reading and improper switching.
Can it control both external and in-pipe heating cables?
Yes, when the cable voltage and load are compatible. The controller and sensor always remain outside the pipe.
Will it restart after a power outage?
It retains the previous power status and temperature setting after power is restored.
Does this controller replace pipe insulation?
No. Proper heating cable installation and suitable pipe insulation are still required.
Guides & Resources
Check Before Connecting Power
- Match the controller, heating cable, and supply voltage.
- Keep the total connected load below 15A.
- Install the heating cable before connecting the controller.
- Secure the sensor against the pipe.
- Keep the sensor separated from the heating cable.
- Use suitable circuit and ground-fault protection.
- Use a qualified electrician for the 208–240V version.
Read the complete controller manual and heating cable instructions before installation.


