


Description
Smart Roof & Gutter De-Icing Controller — 120V / 240V
Automatic control for compatible roof, gutter, and downspout heating cable systems.
- Choose 120V plug-in or 208–240V hardwired.
- Uses both temperature and moisture sensing.
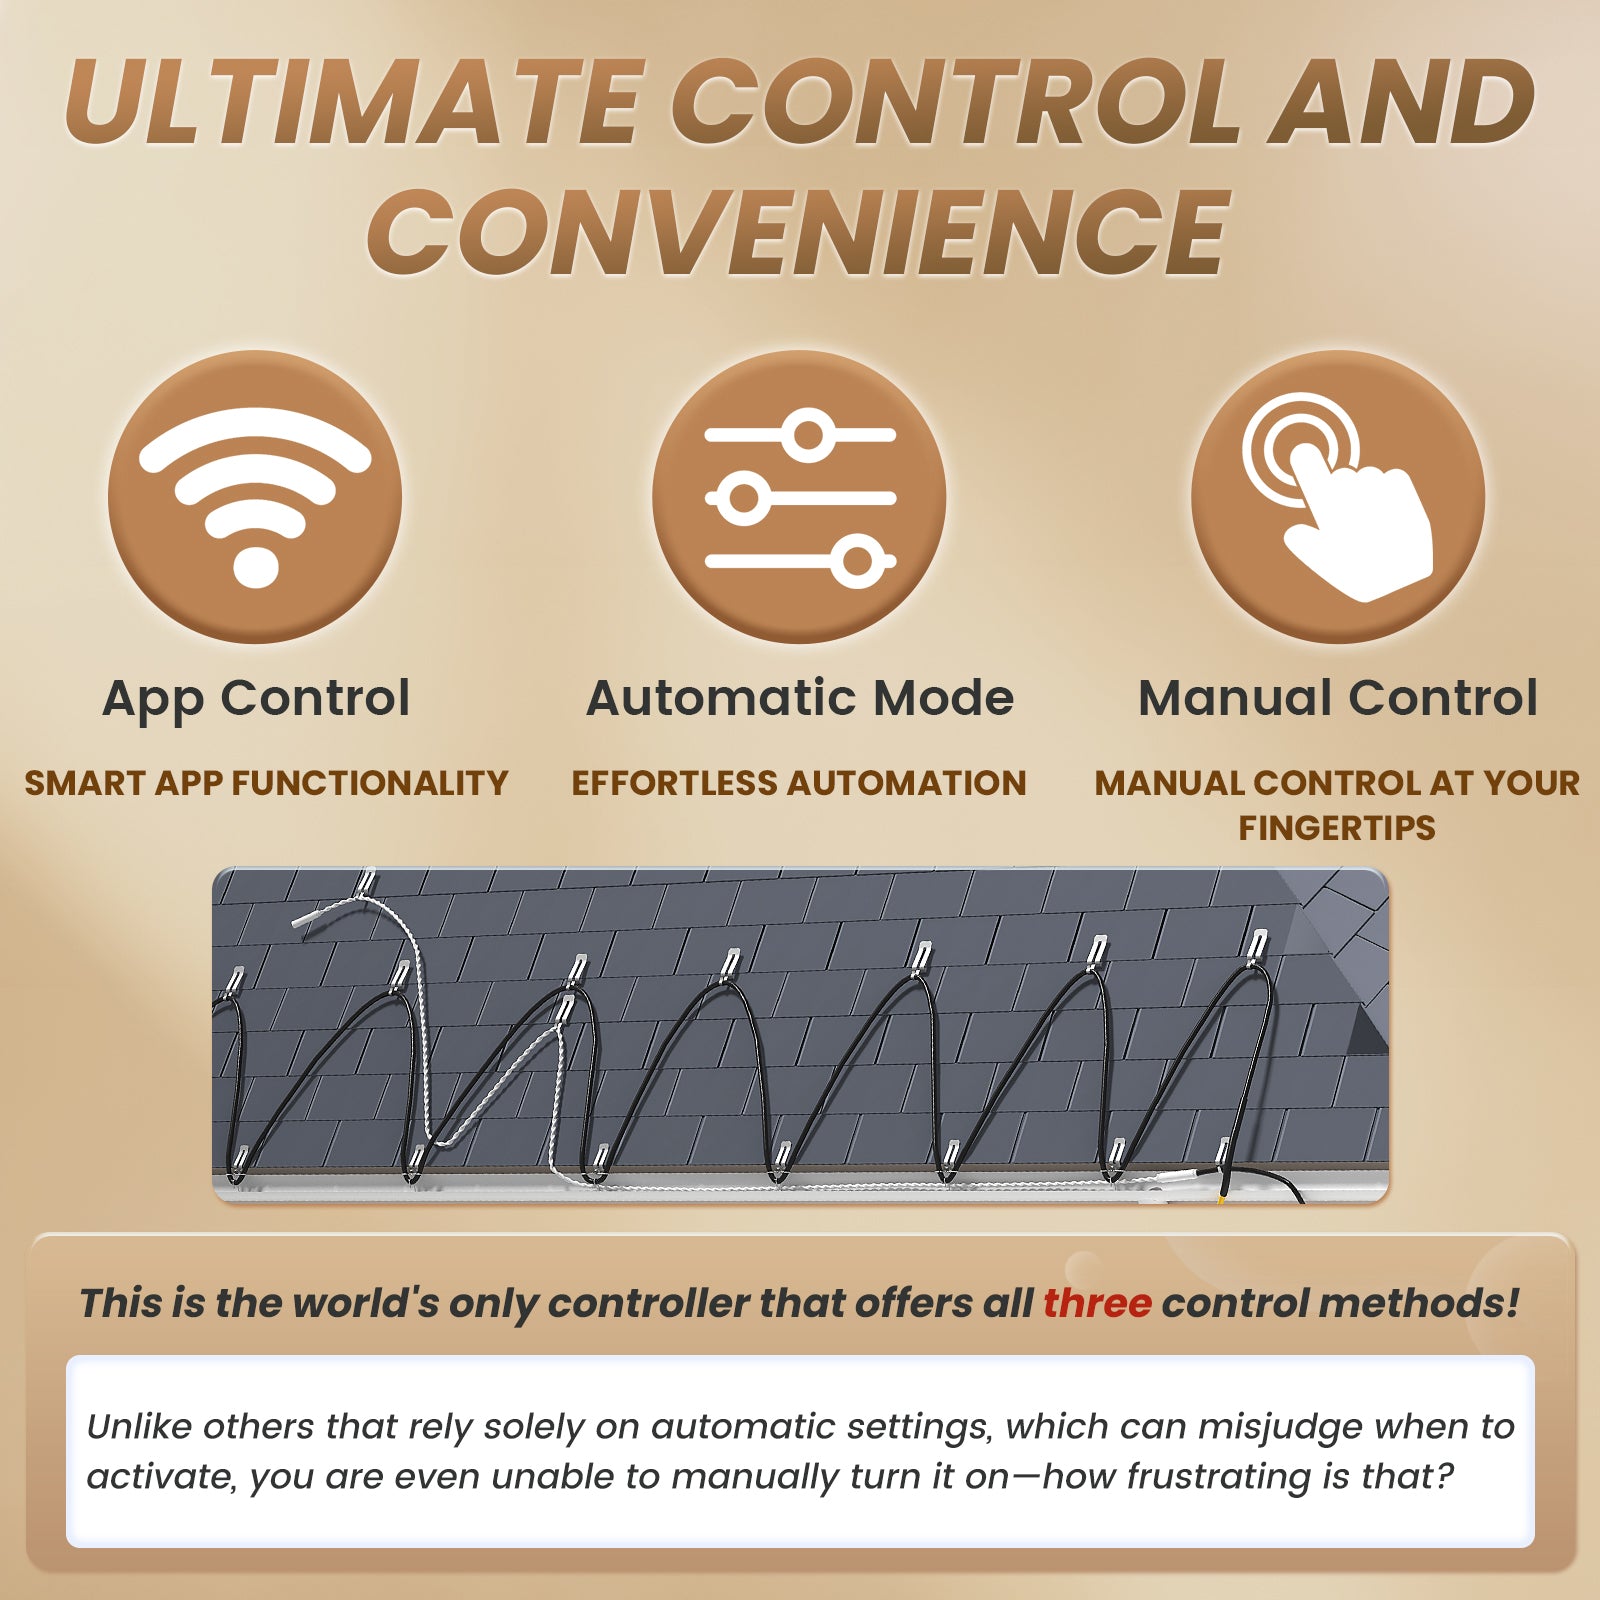
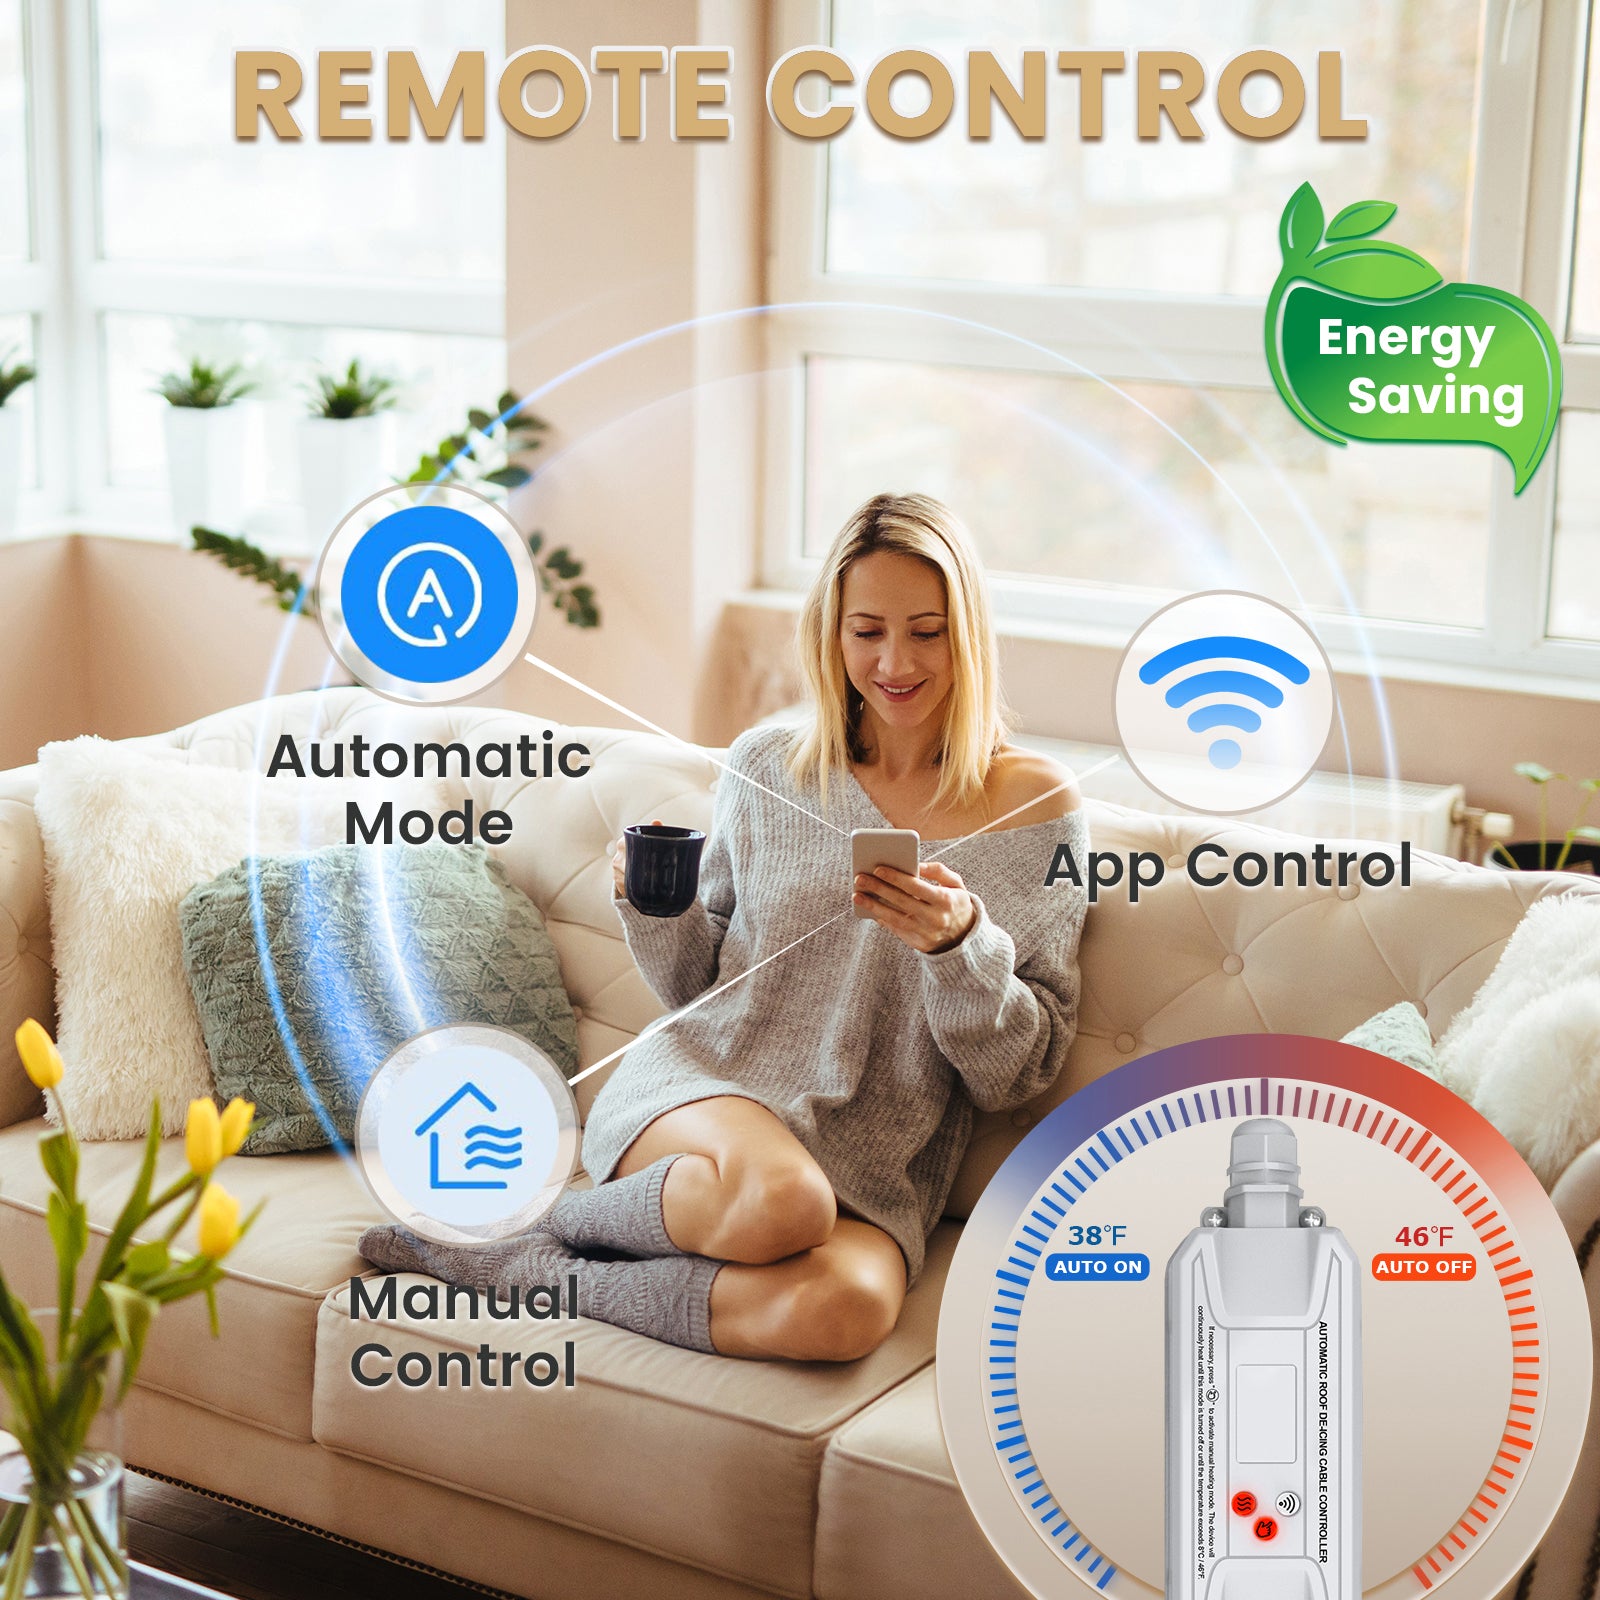
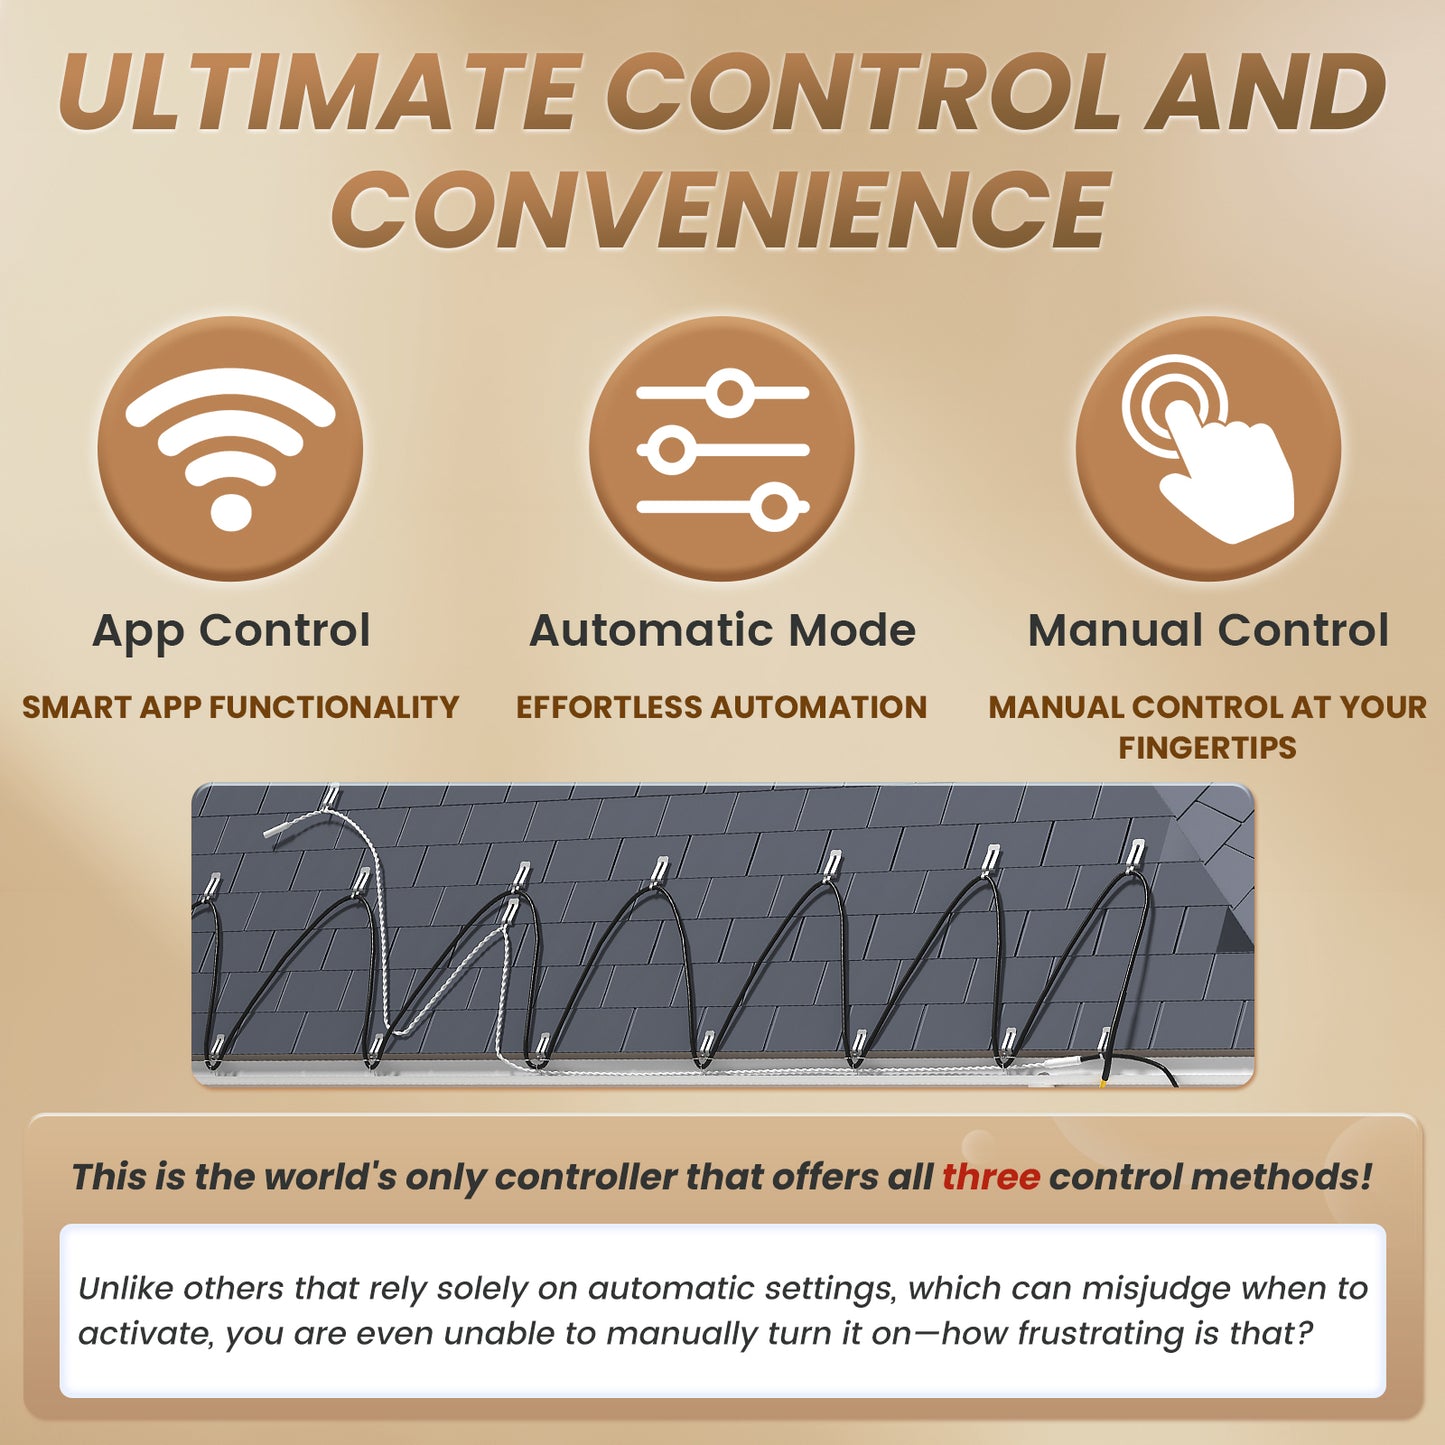
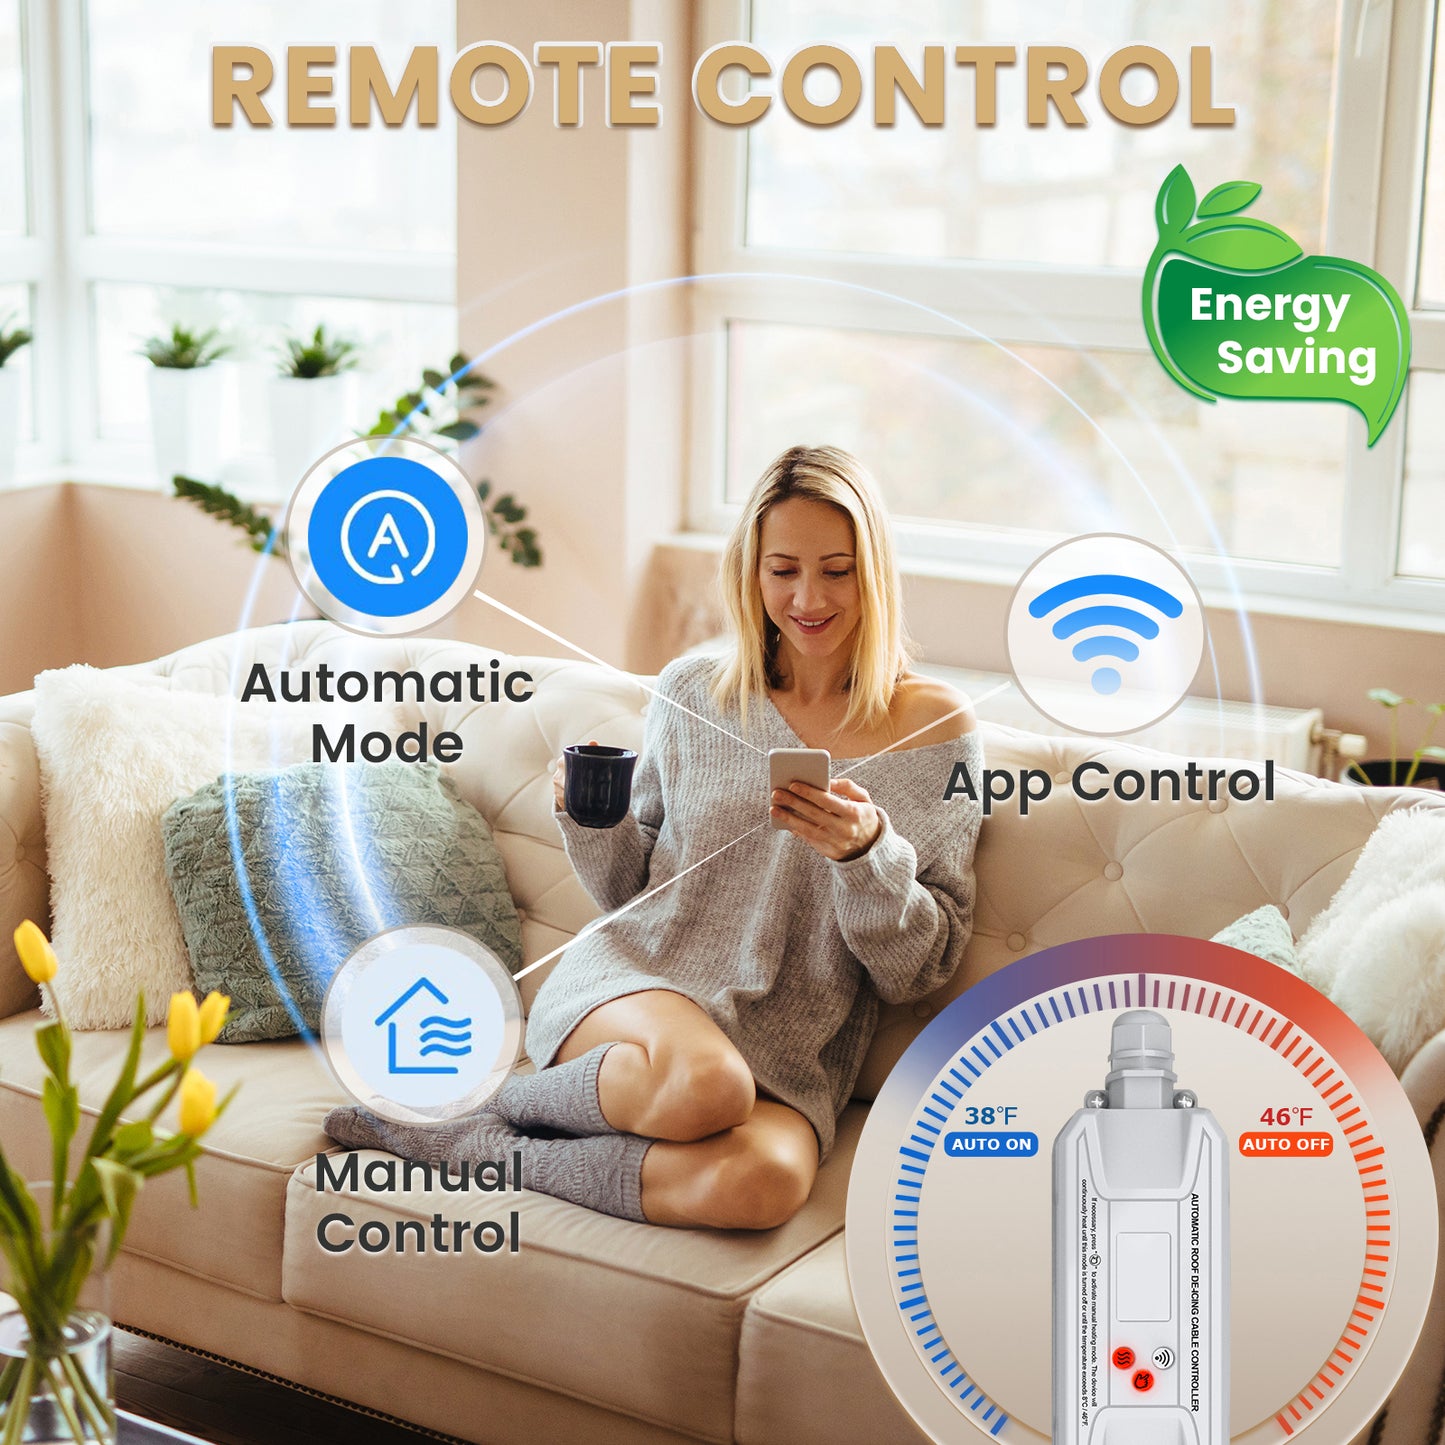
- Supports Automatic, Manual, and Smart Life app control.
- Maximum load: 15A.
- Roof heating cable is sold separately.
Two Voltage Options
120V plug-in for simple installation. 208–240V hardwired for compatible higher-voltage systems.
Dual-Sensor Control
Uses outdoor temperature and detected moisture to manage heating automatically.
Automatic De-Icing
Starts heating when low temperature and moisture are detected together.
Smart Life App
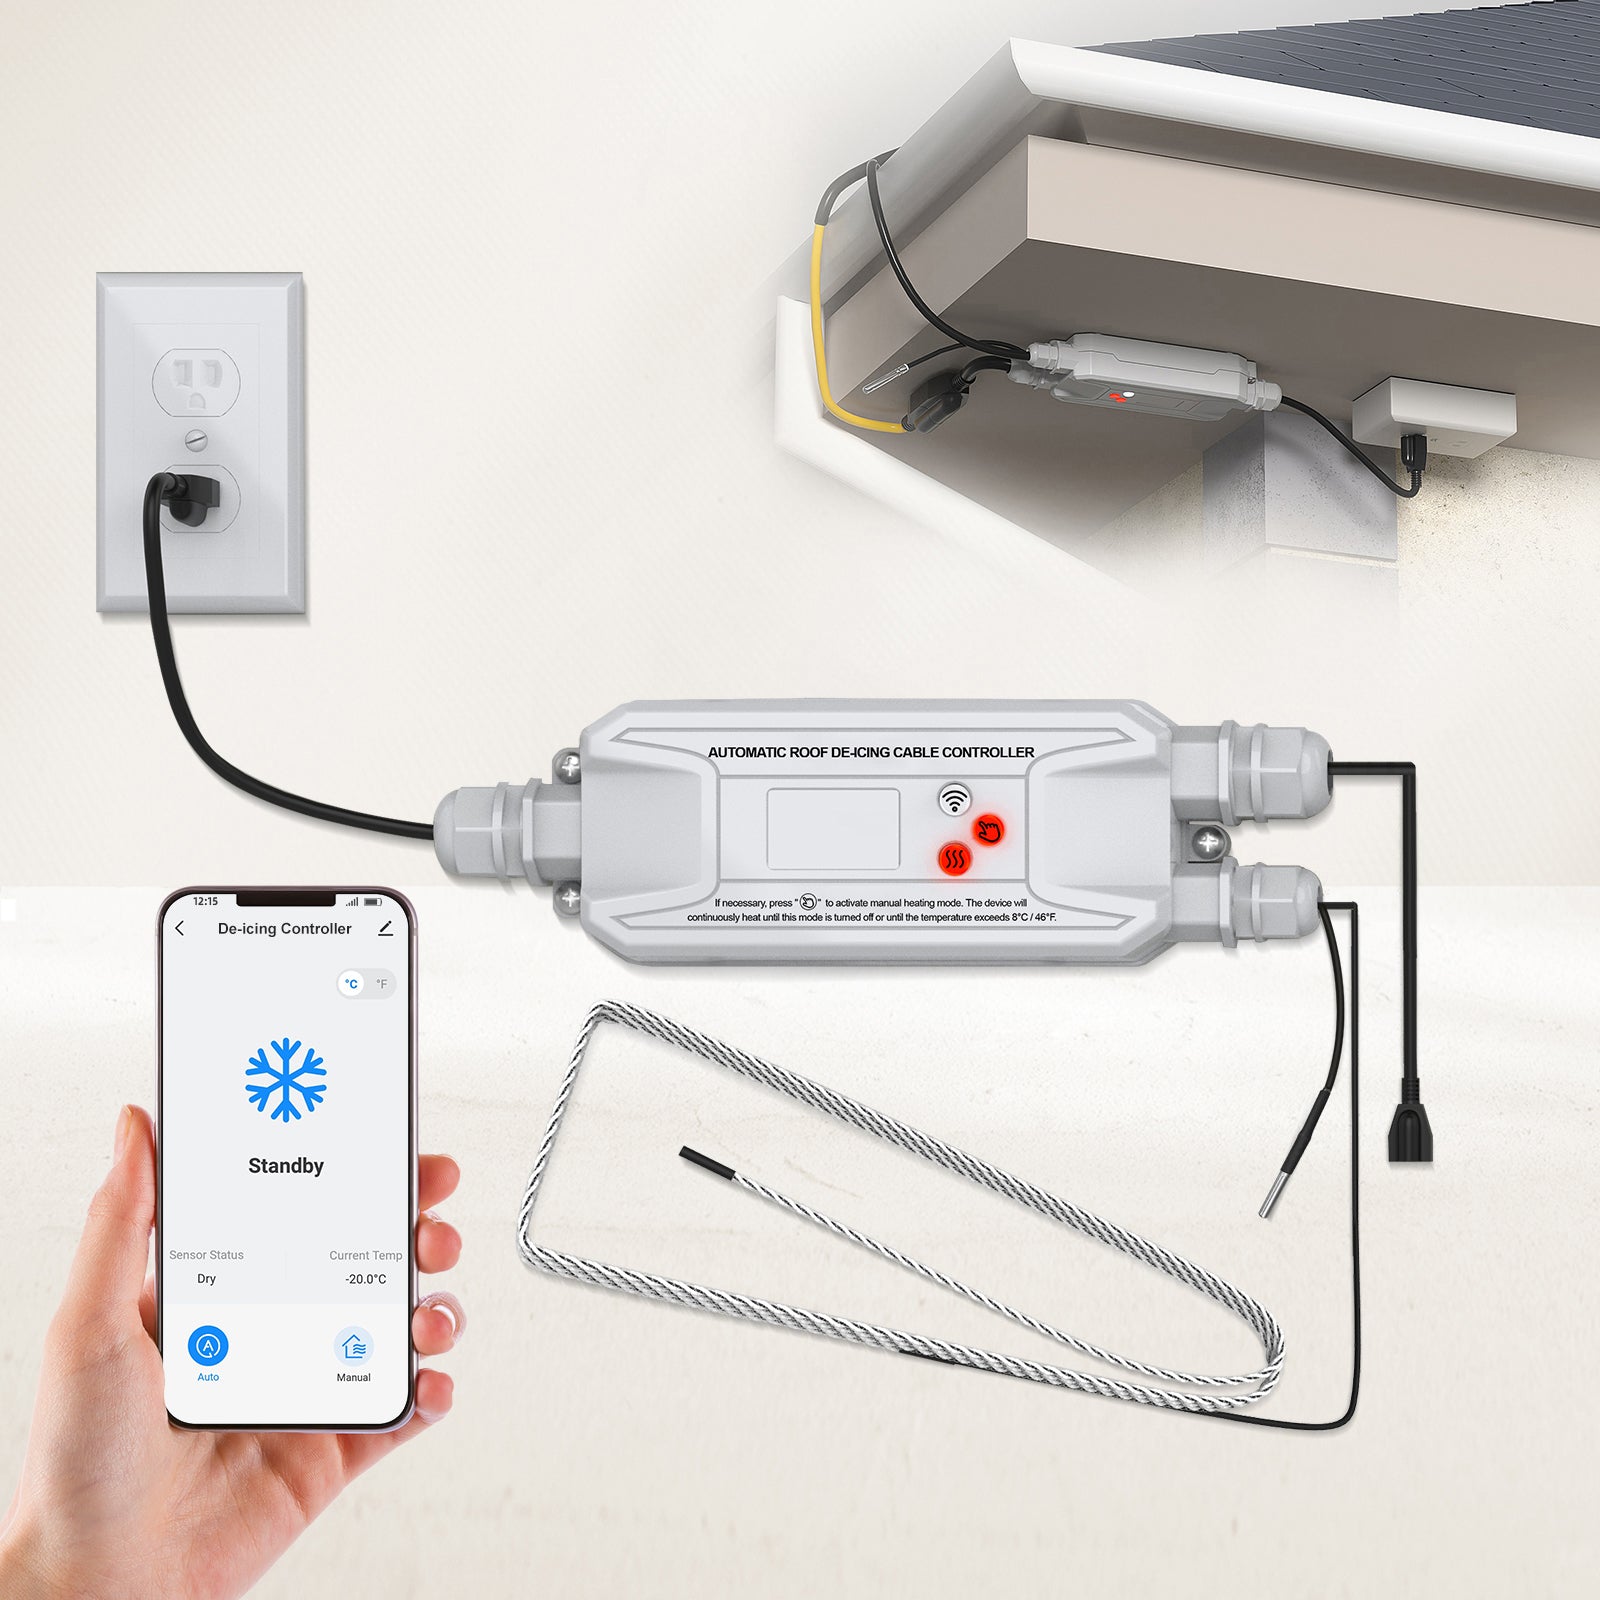
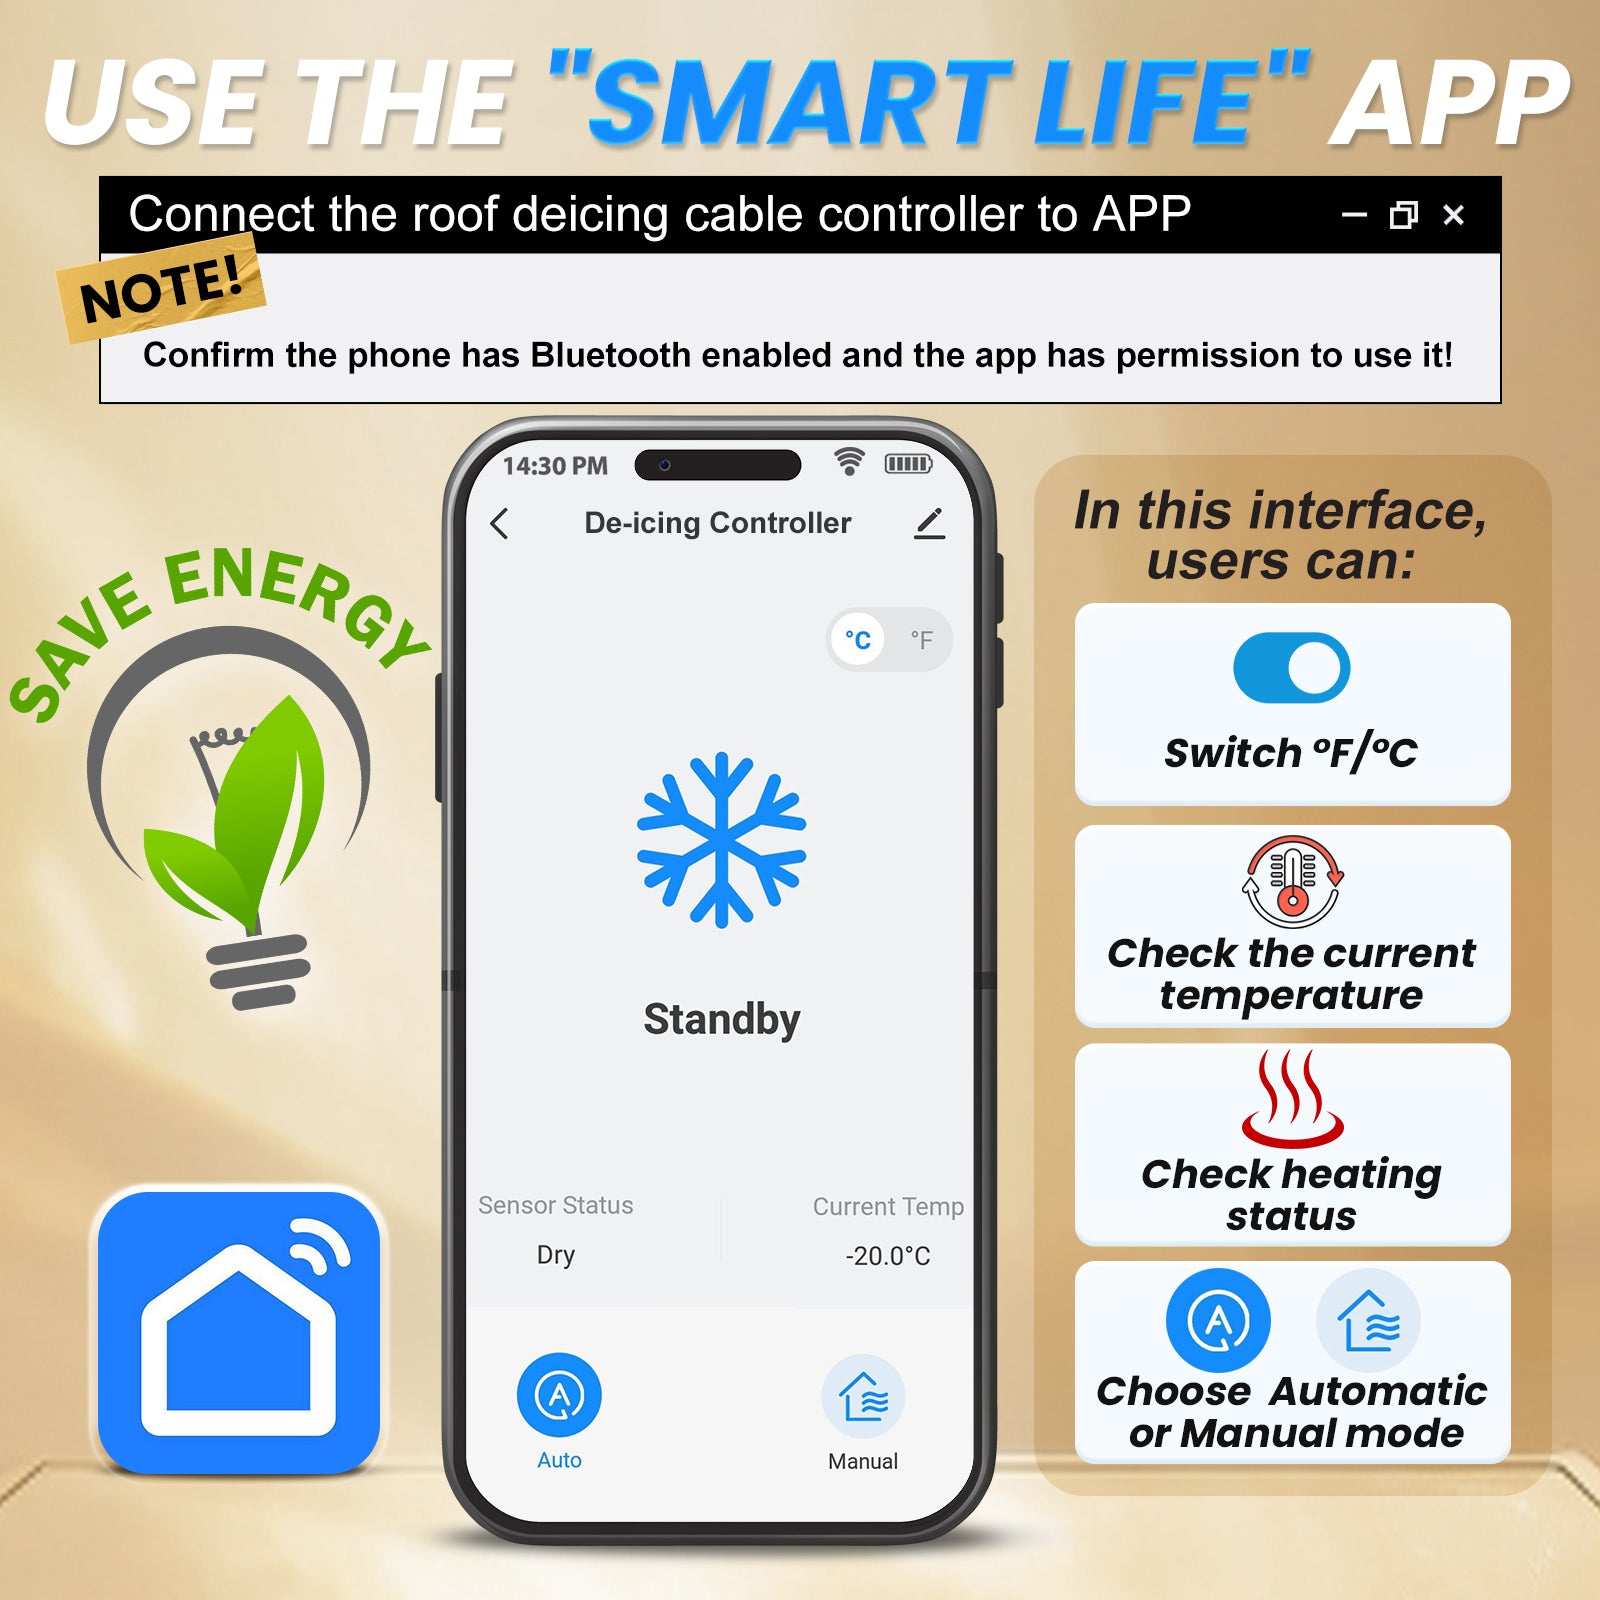
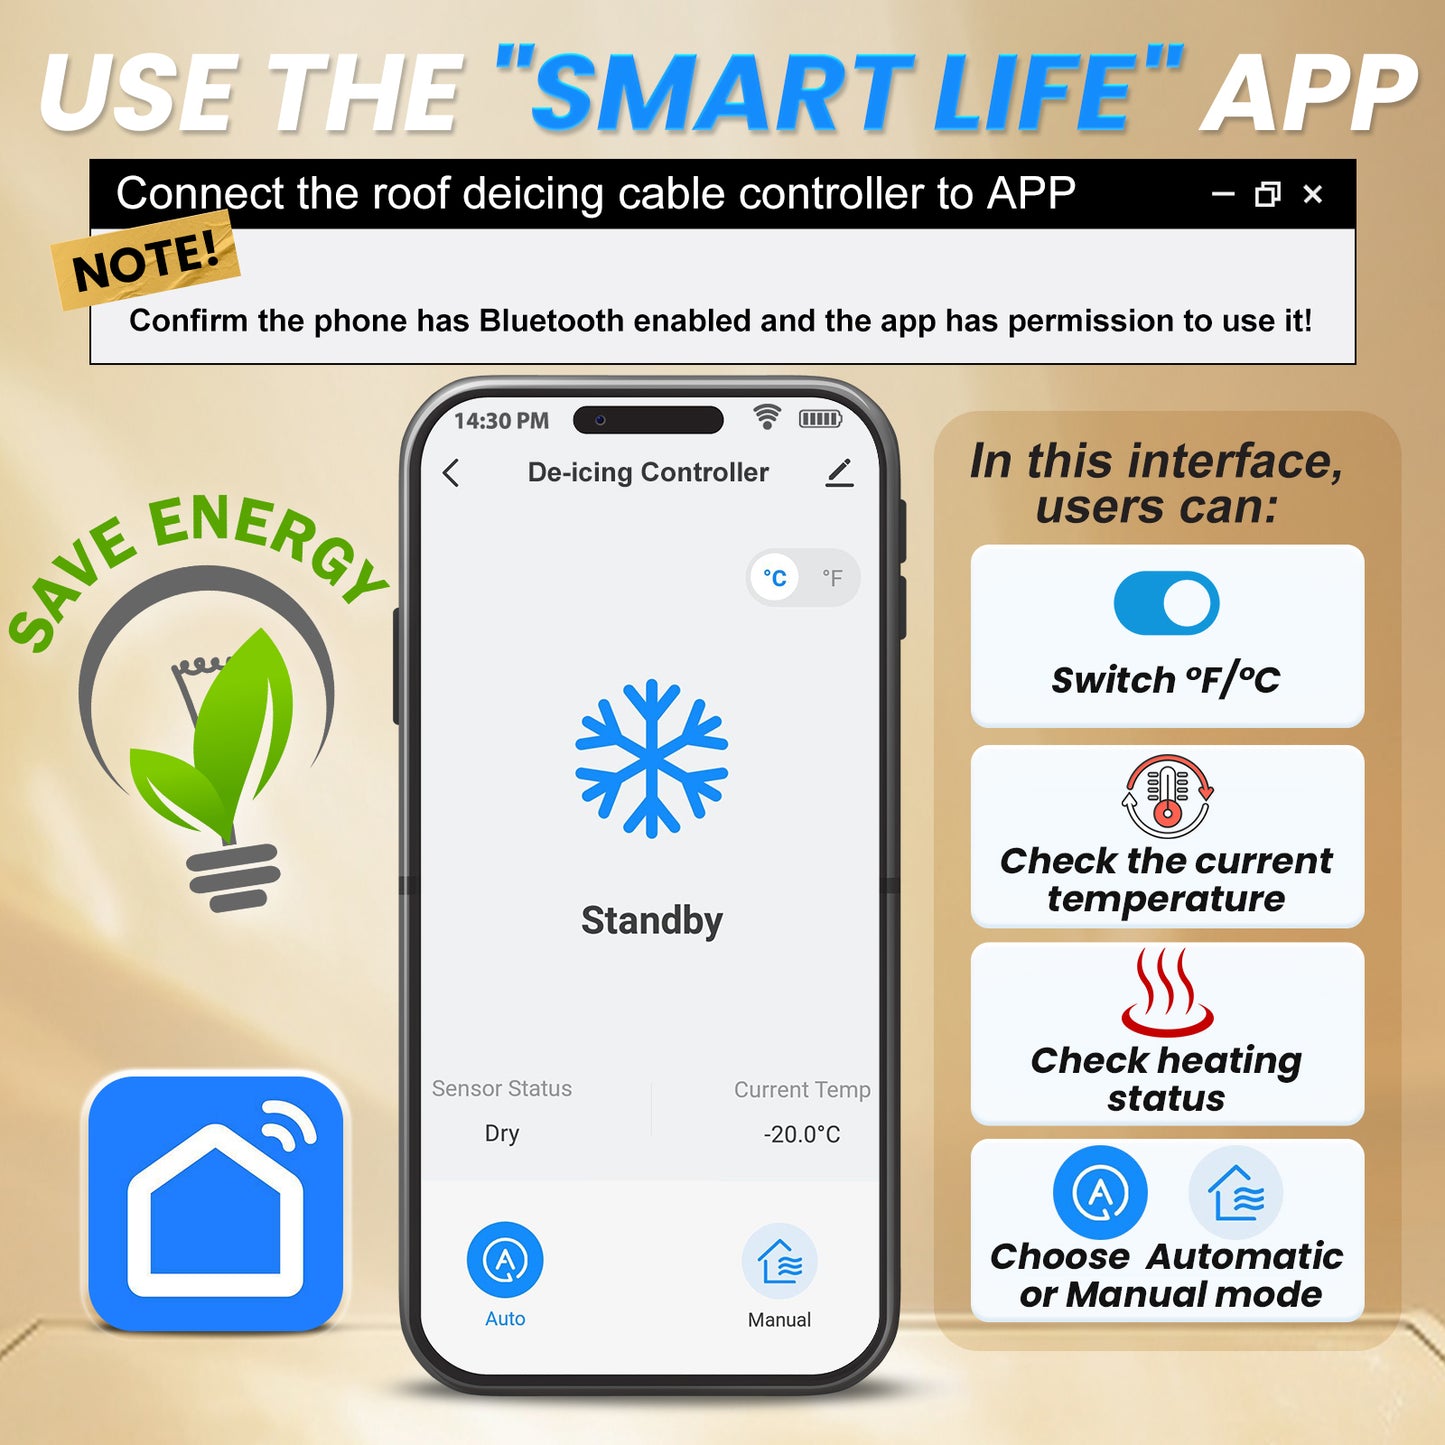
Check system status and change operating modes through a compatible smartphone.
15A Maximum Load
Up to 1800W at 120V, 3120W at 208V, or 3600W at 240V.
Outdoor-Rated Housing
IP65-rated housing for installation under a protected roof edge or eave.


Important Before Ordering
Confirm the Voltage, Load and Installation Type
- Controller Only: Roof heating cable is sold separately.
- Roof Systems Only: Designed for roof, gutter, and downspout de-icing cable.
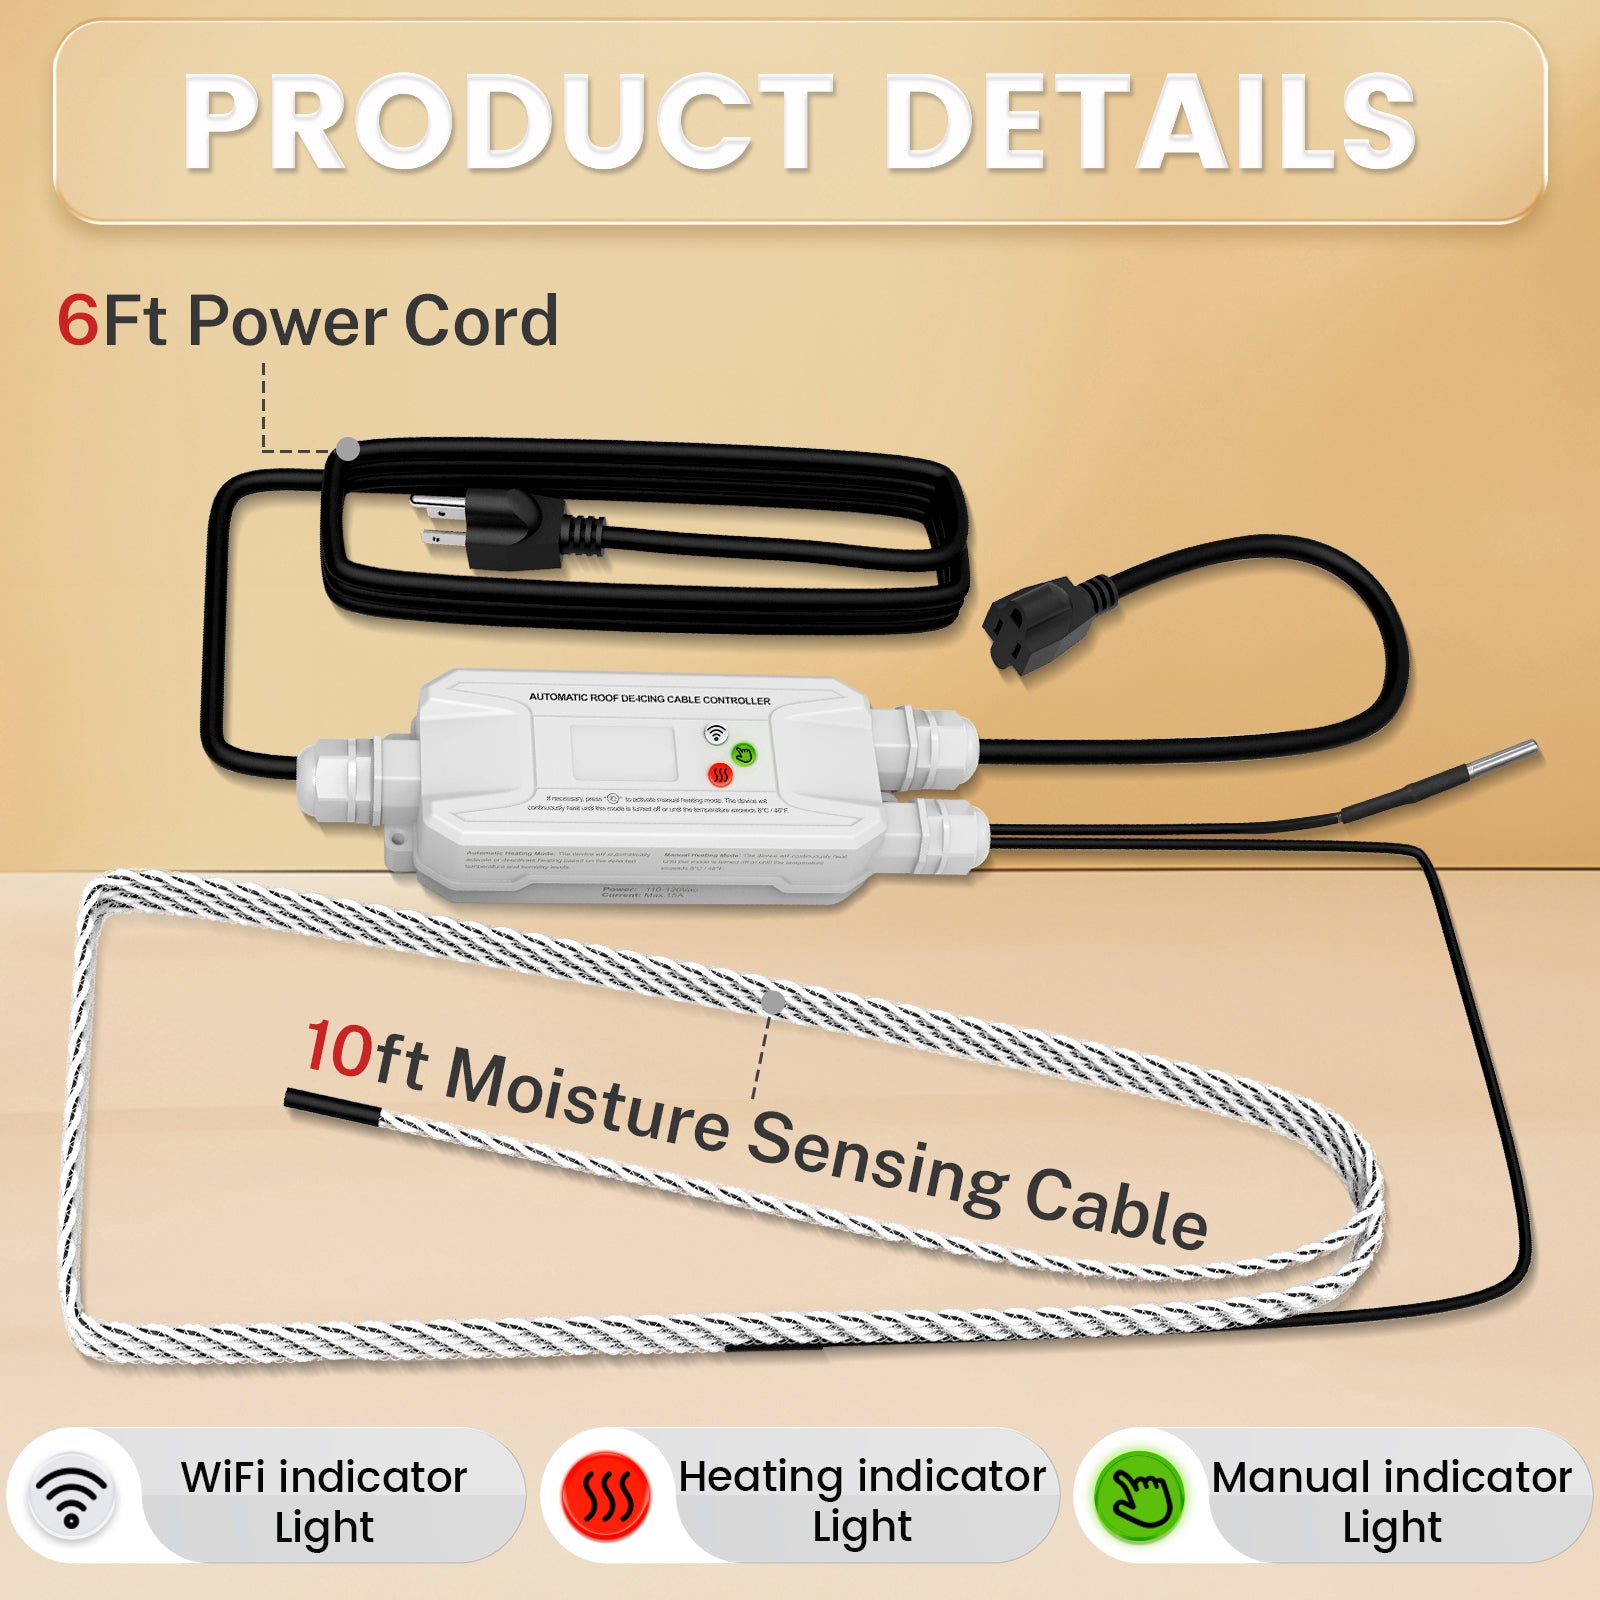
- 120V Plug-In: Includes a grounded input plug and plug-in output receptacle.
- 208–240V Hardwired: Does not include a direct power plug or output receptacle.
- Maximum Load: 15A for both voltage options.
- Voltage Must Match: The controller, heating cable, and supply must use the same system voltage.
- One Cable per Controller: Do not combine multiple heating cables through splitters.
- Professional Installation: The 208–240V version requires field termination by a qualified electrician.
- Hardwired Connections: Use L1, L2, and Equipment Ground. No Neutral connection is used.
- 2.4 GHz WiFi: Required for Smart Life app setup.
- Automatic Mode: Requires both low temperature and detected moisture.
- Sensor Placement: Incorrect placement may delay or prevent automatic activation.

Correct Sensor Placement
Temperature Sensor
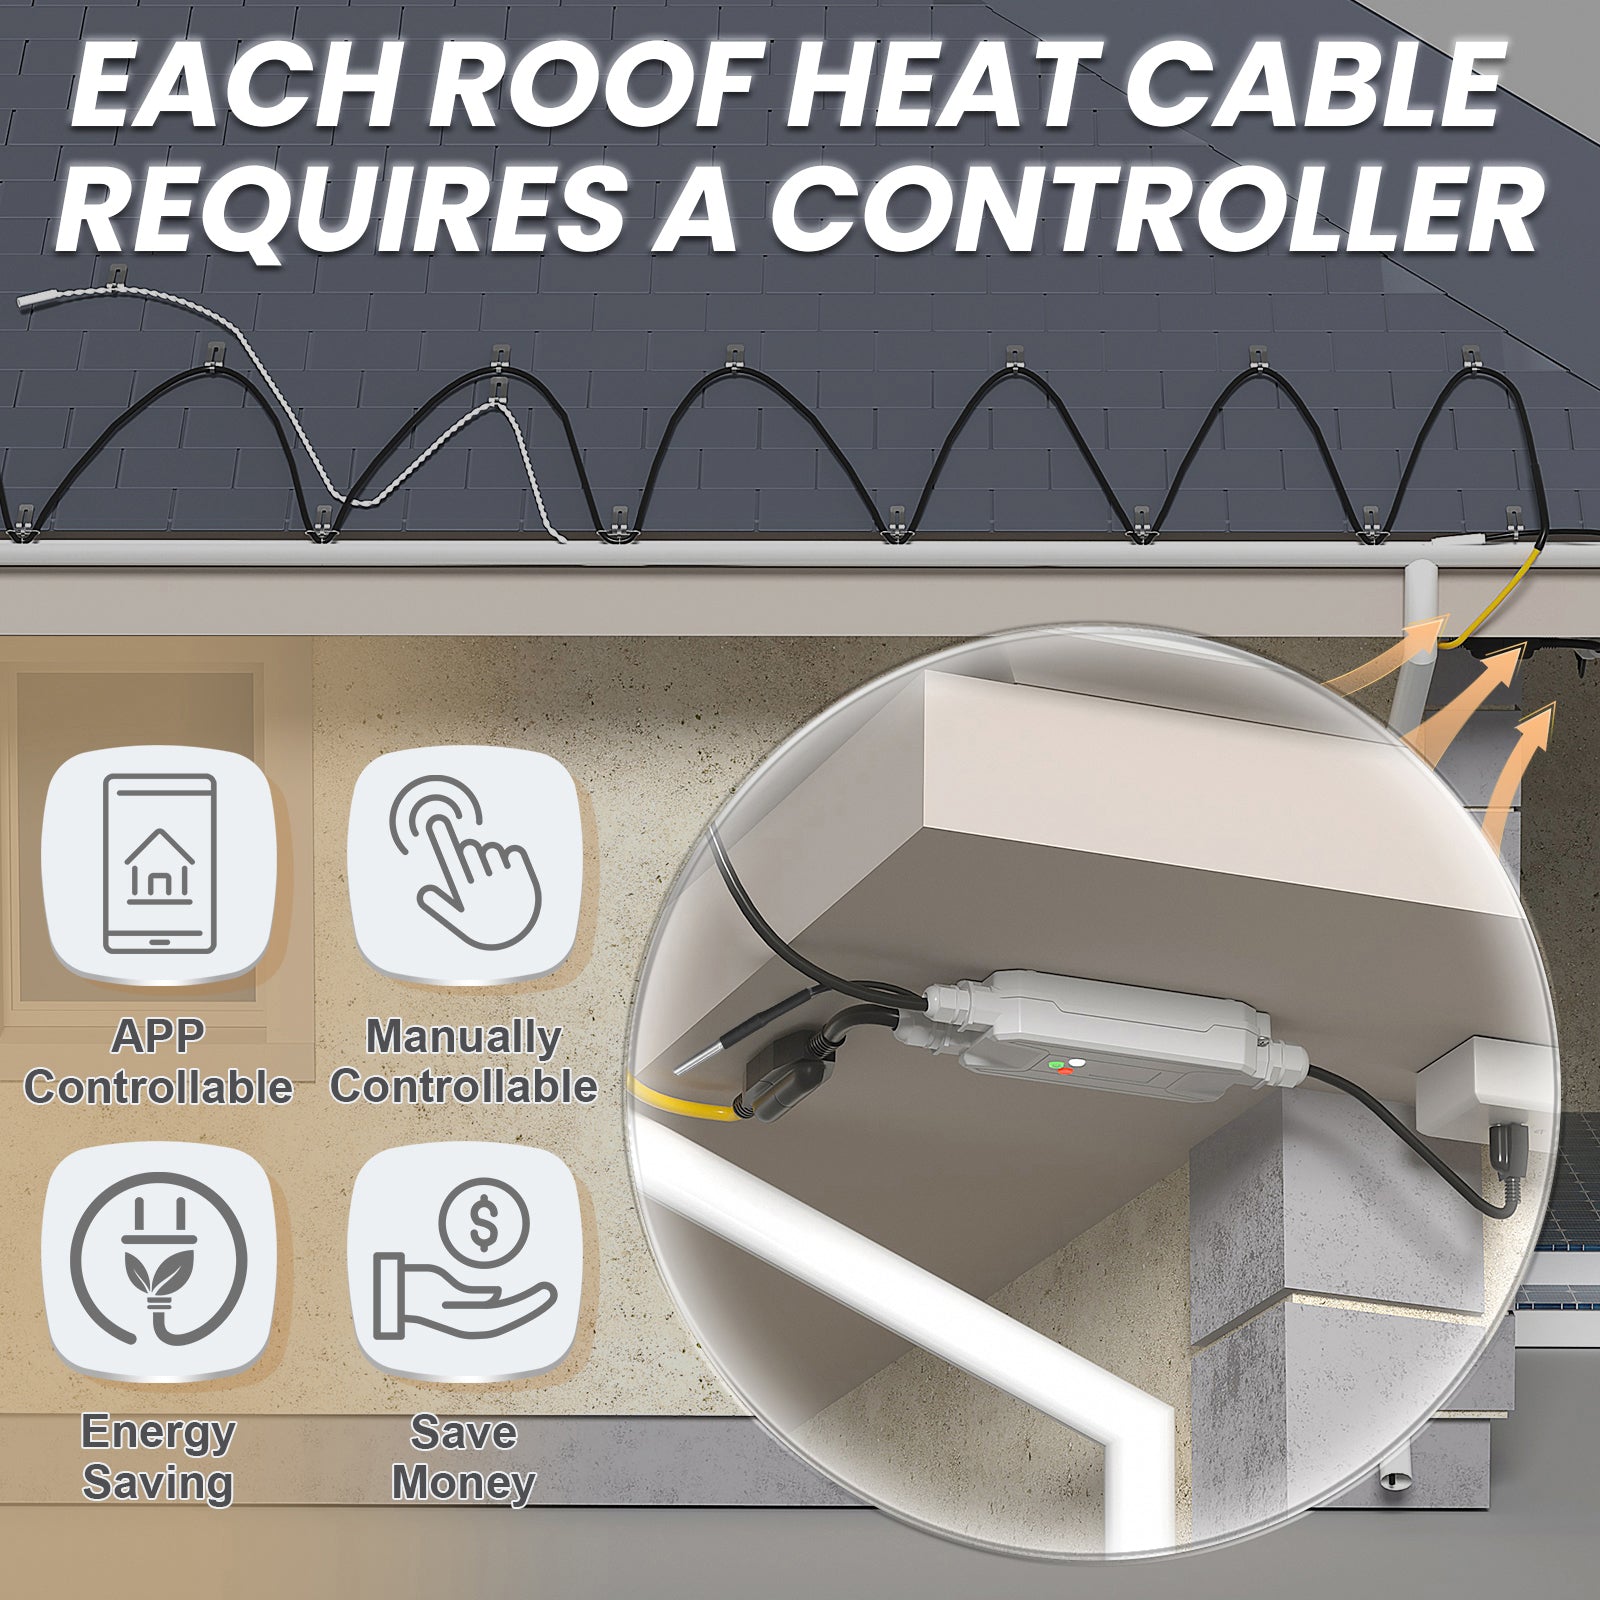
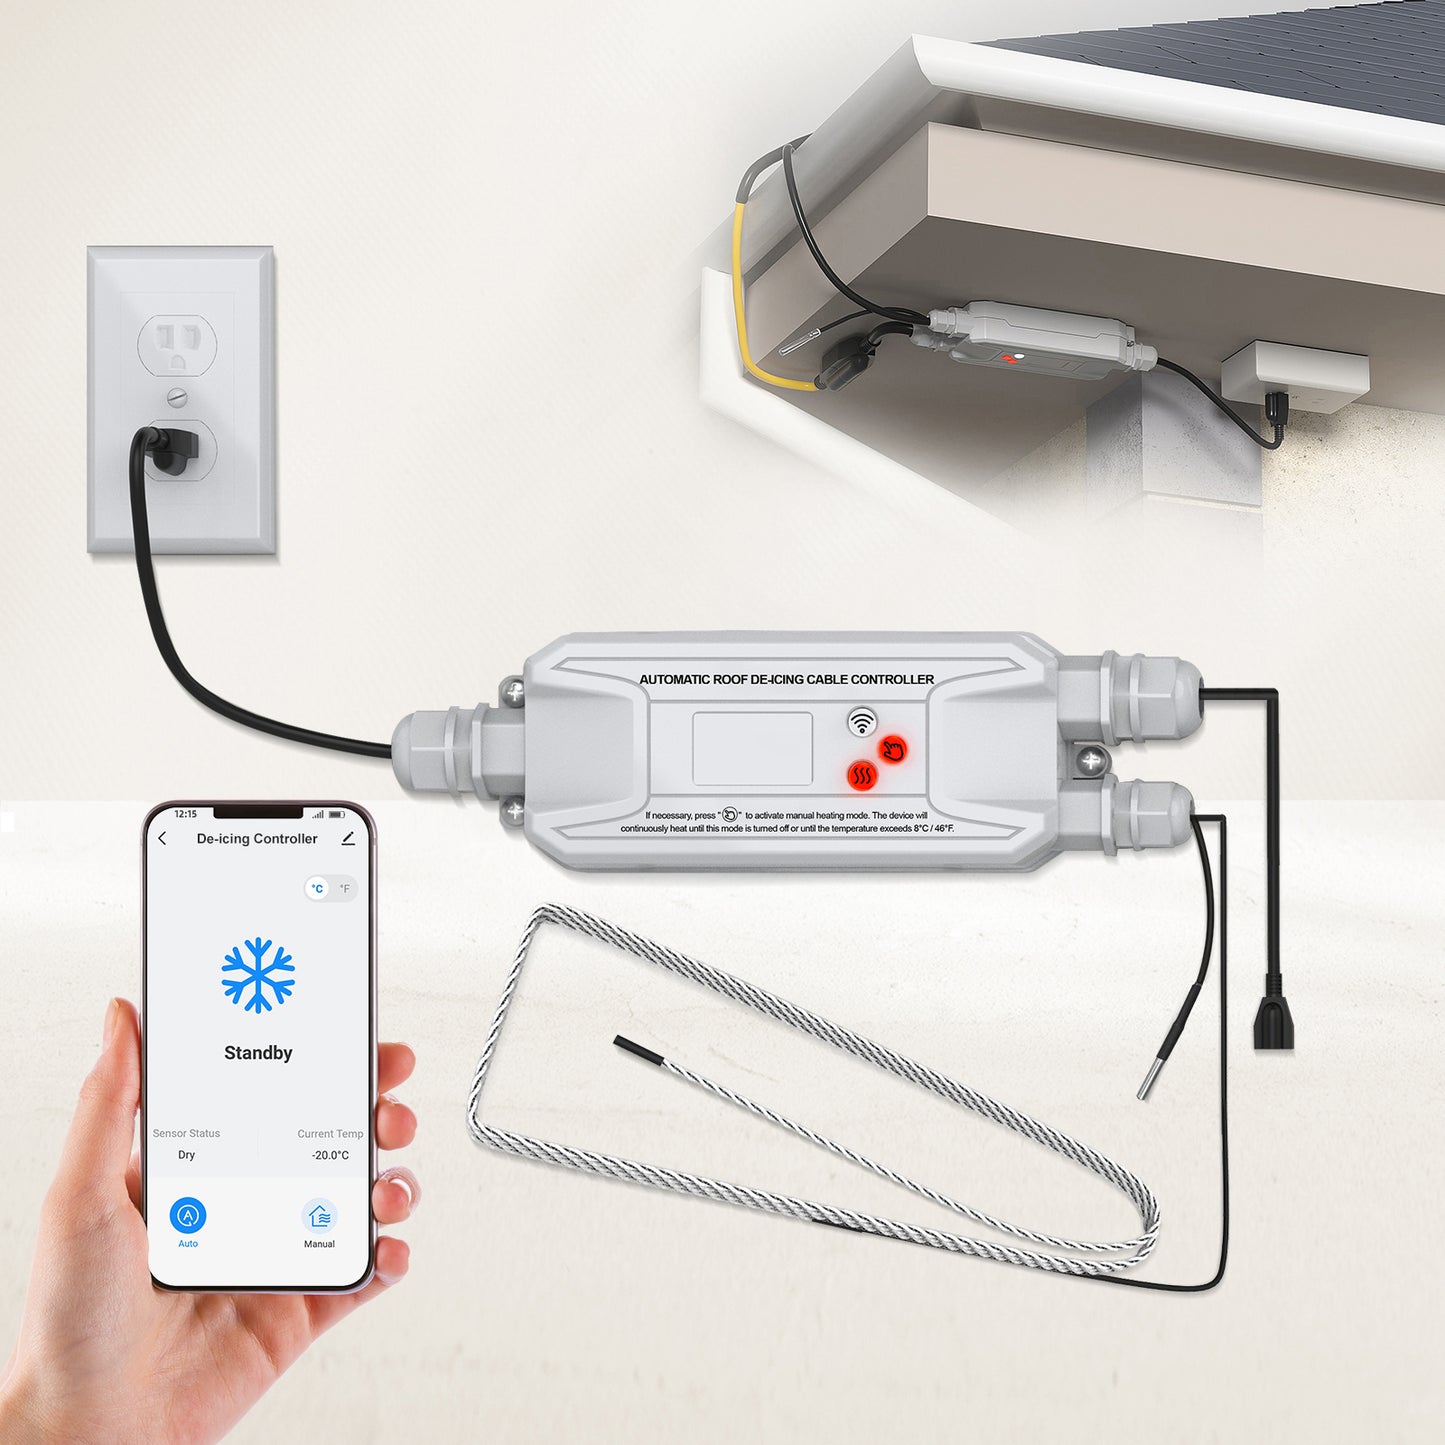
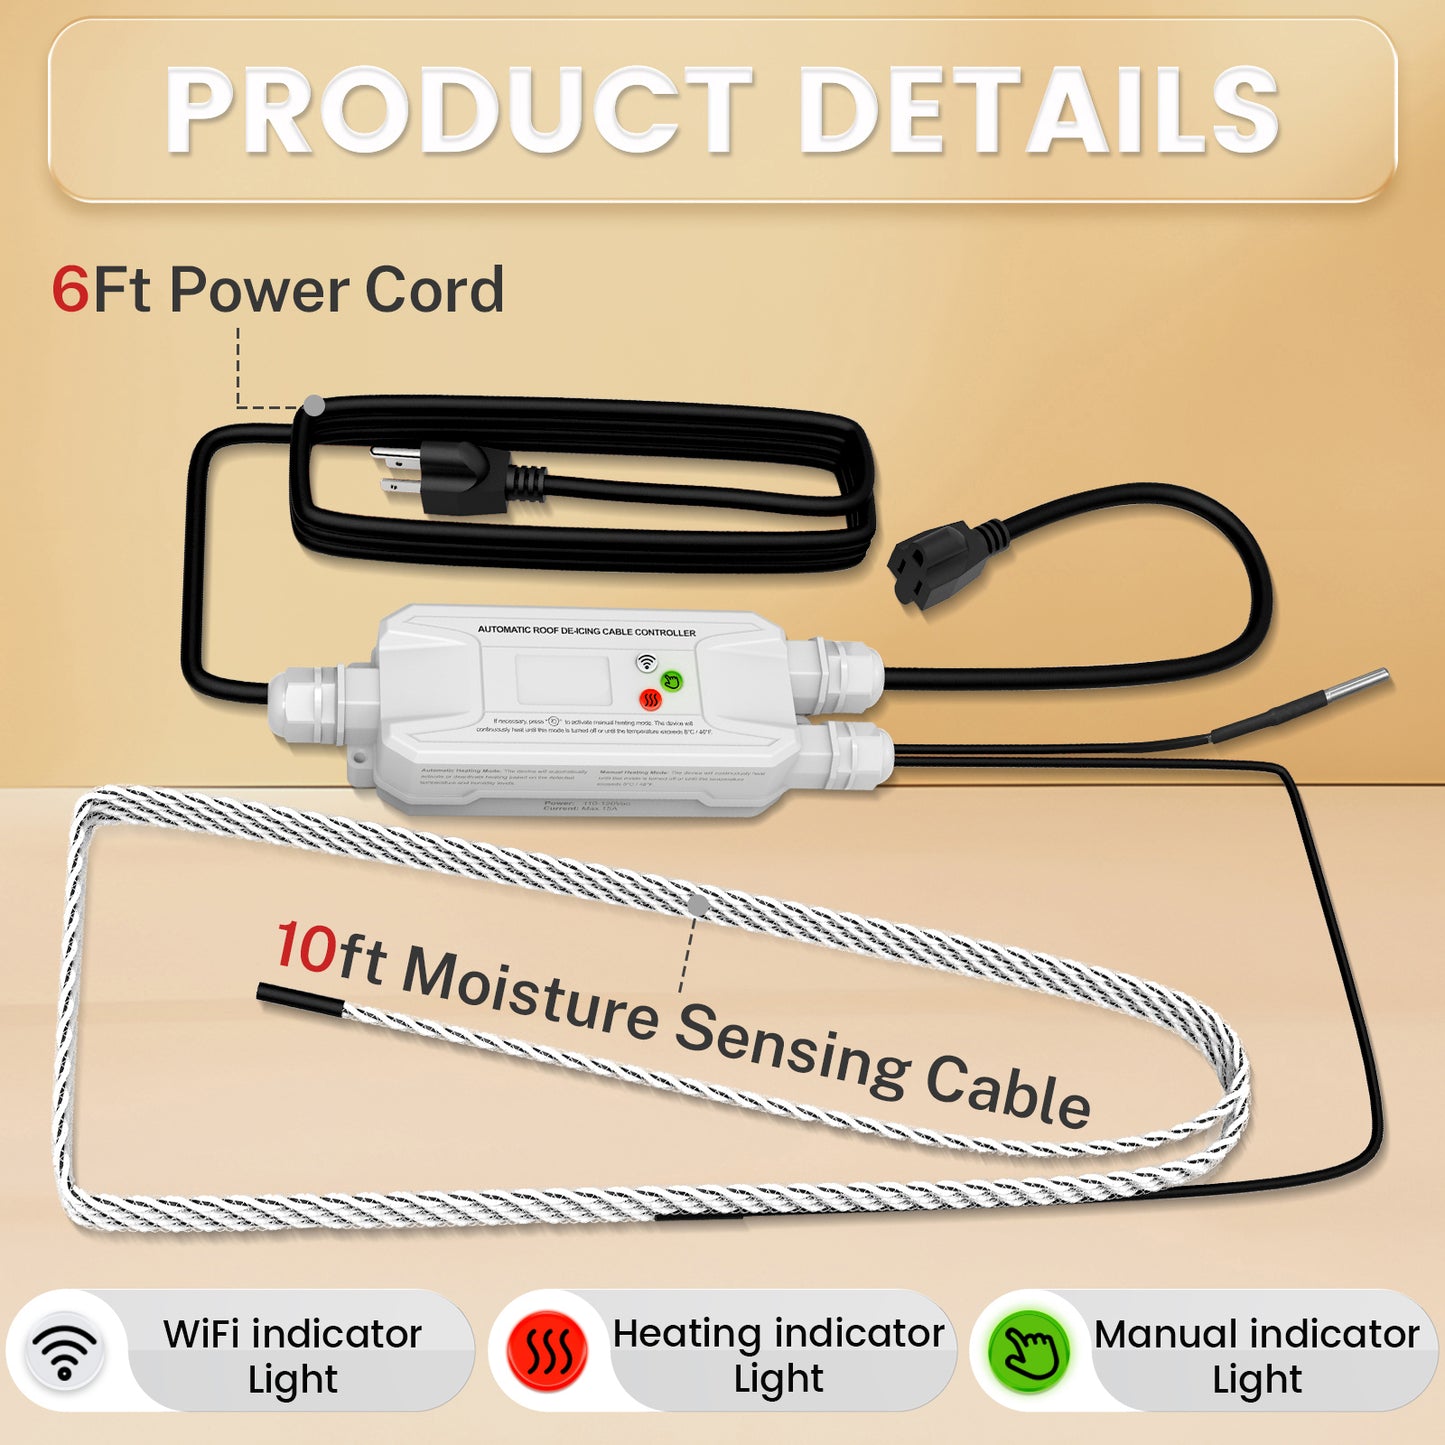
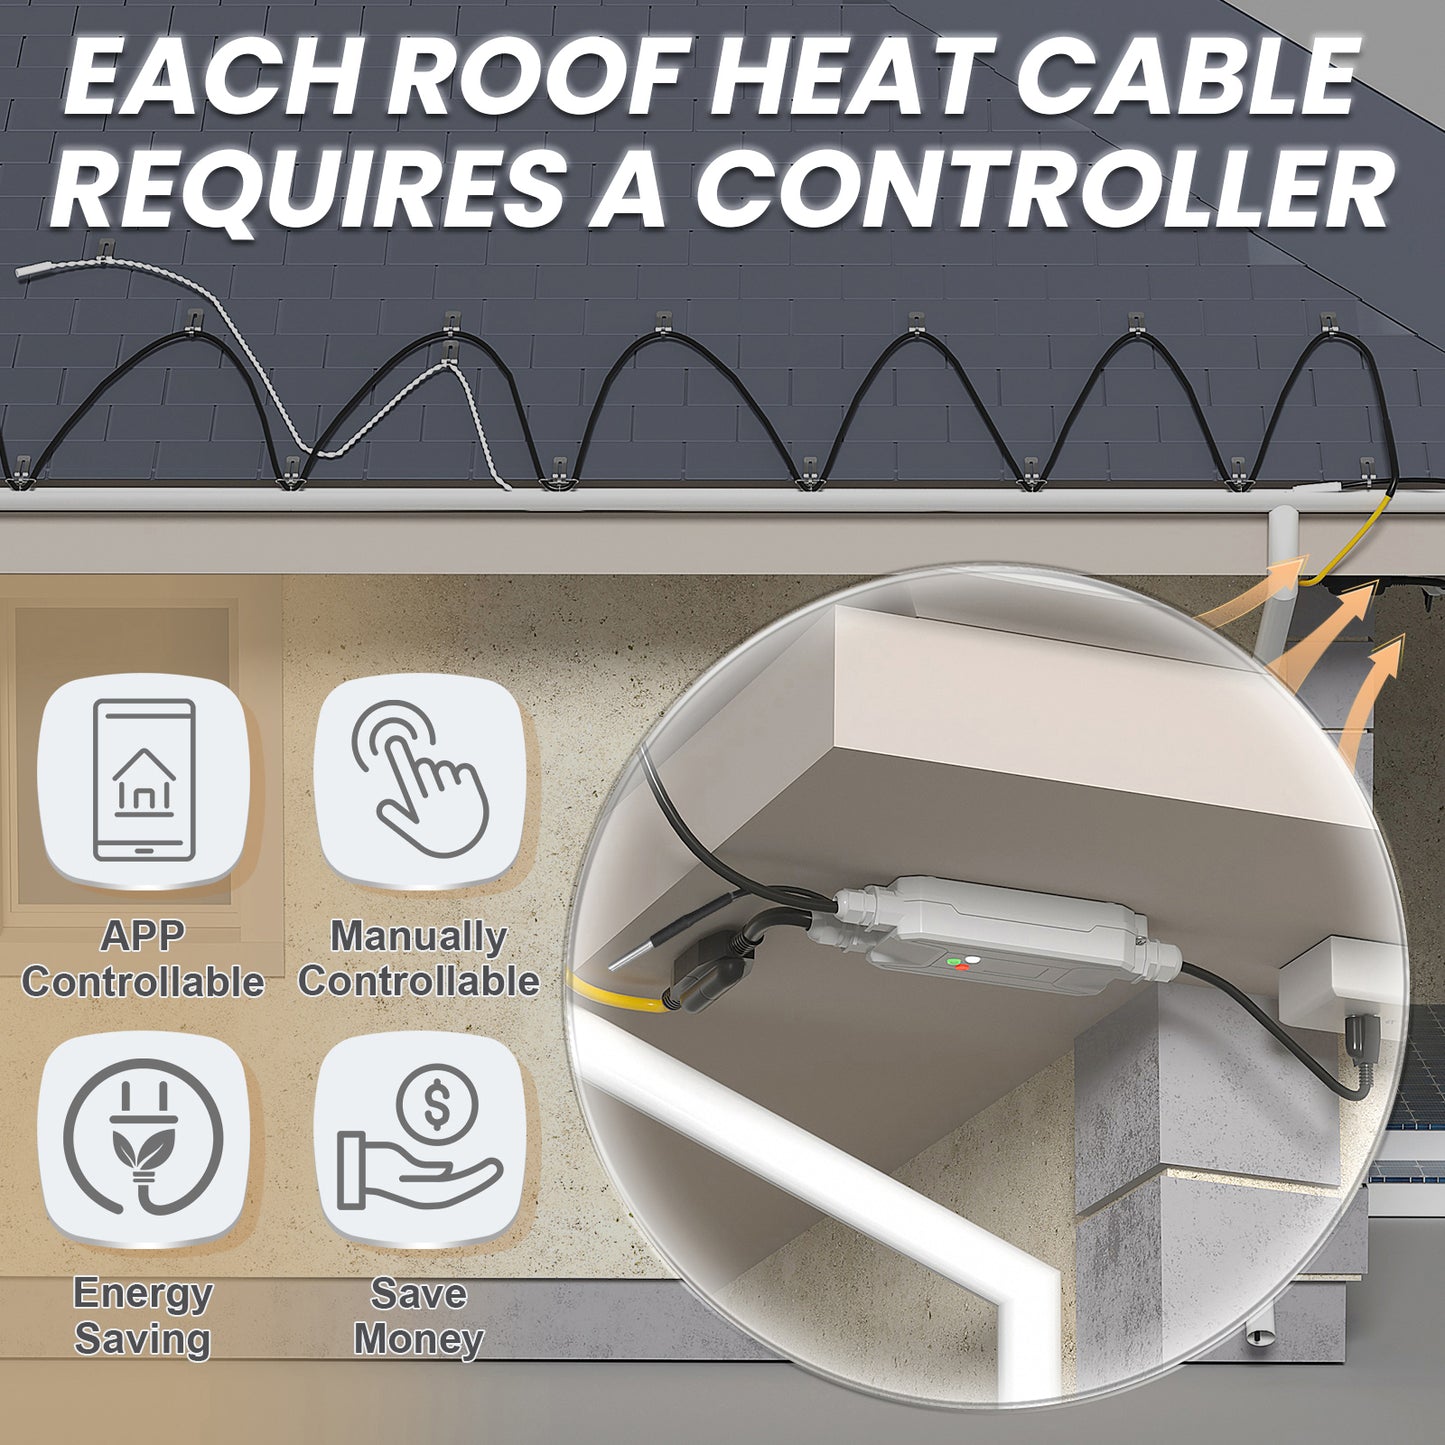
Built into the controller housing. Mount the housing outdoors under the eave.
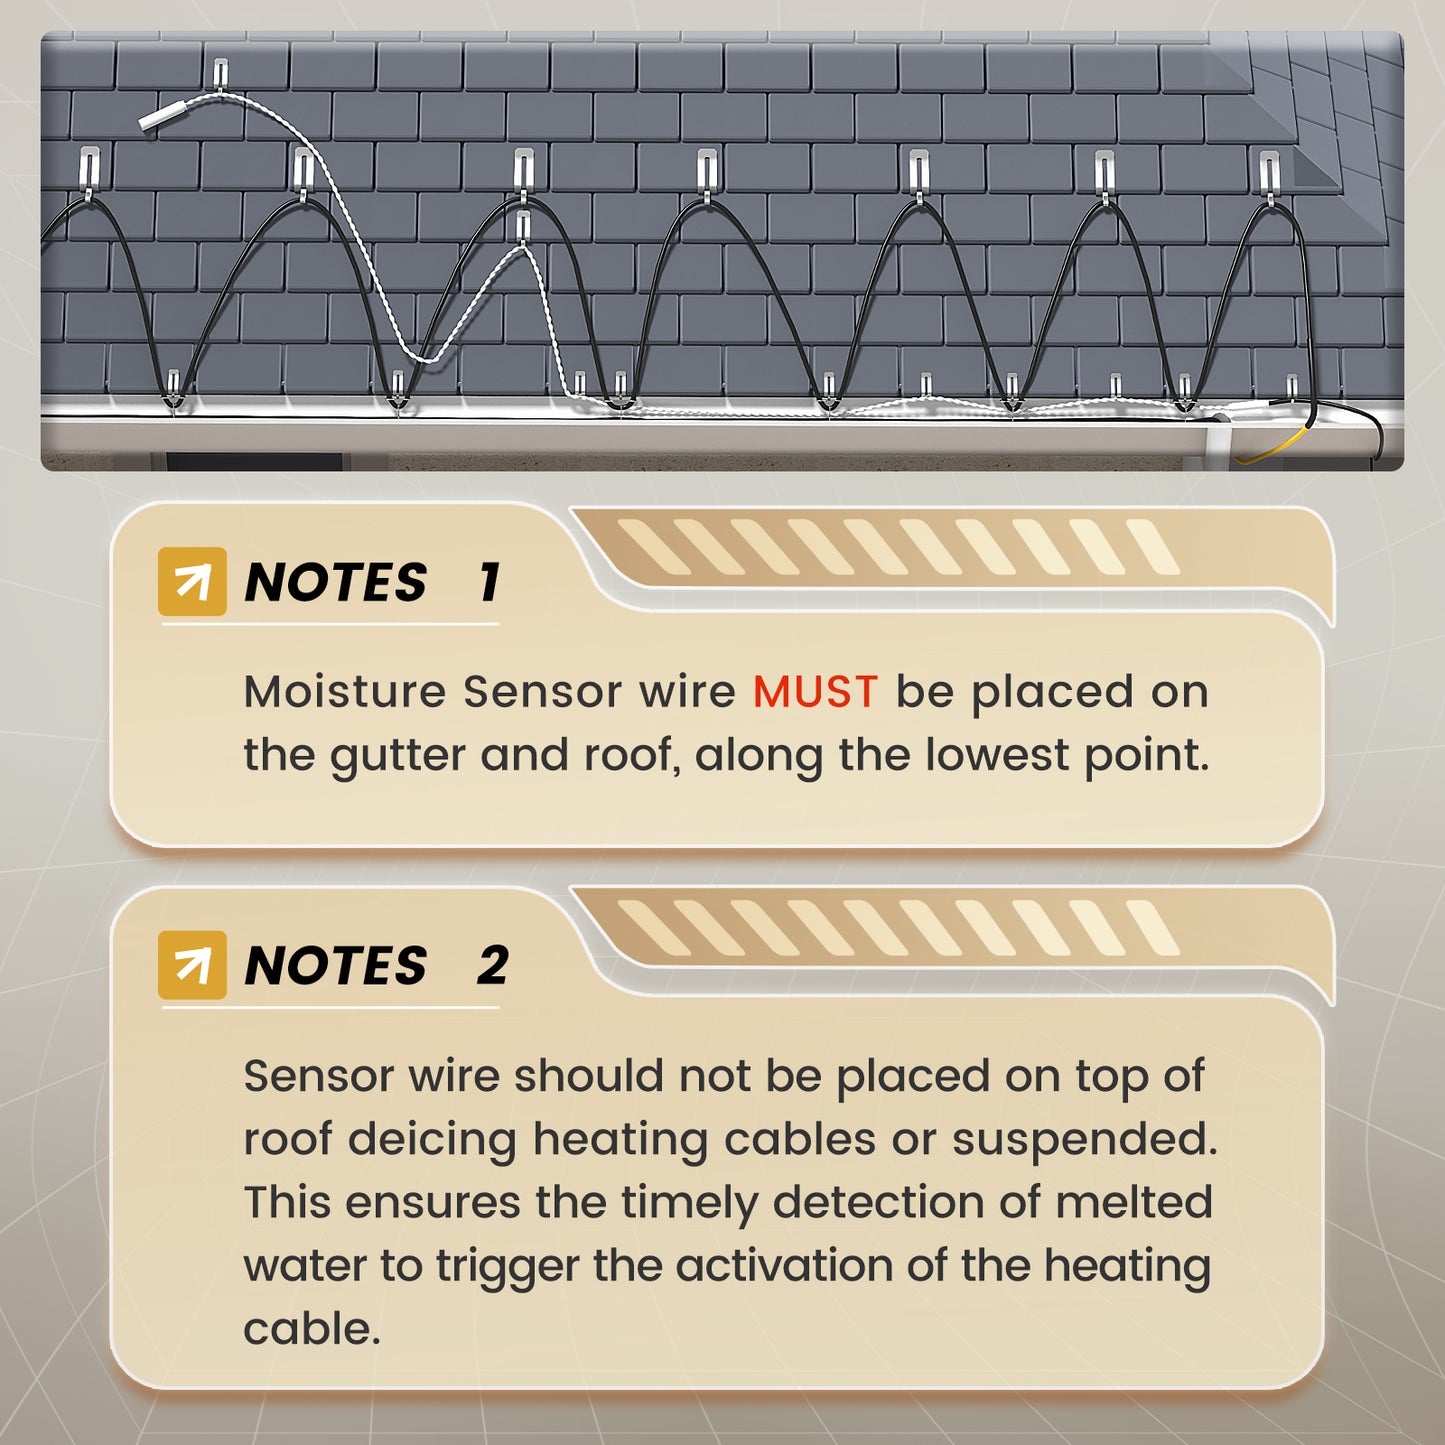
Moisture Sensor Wire
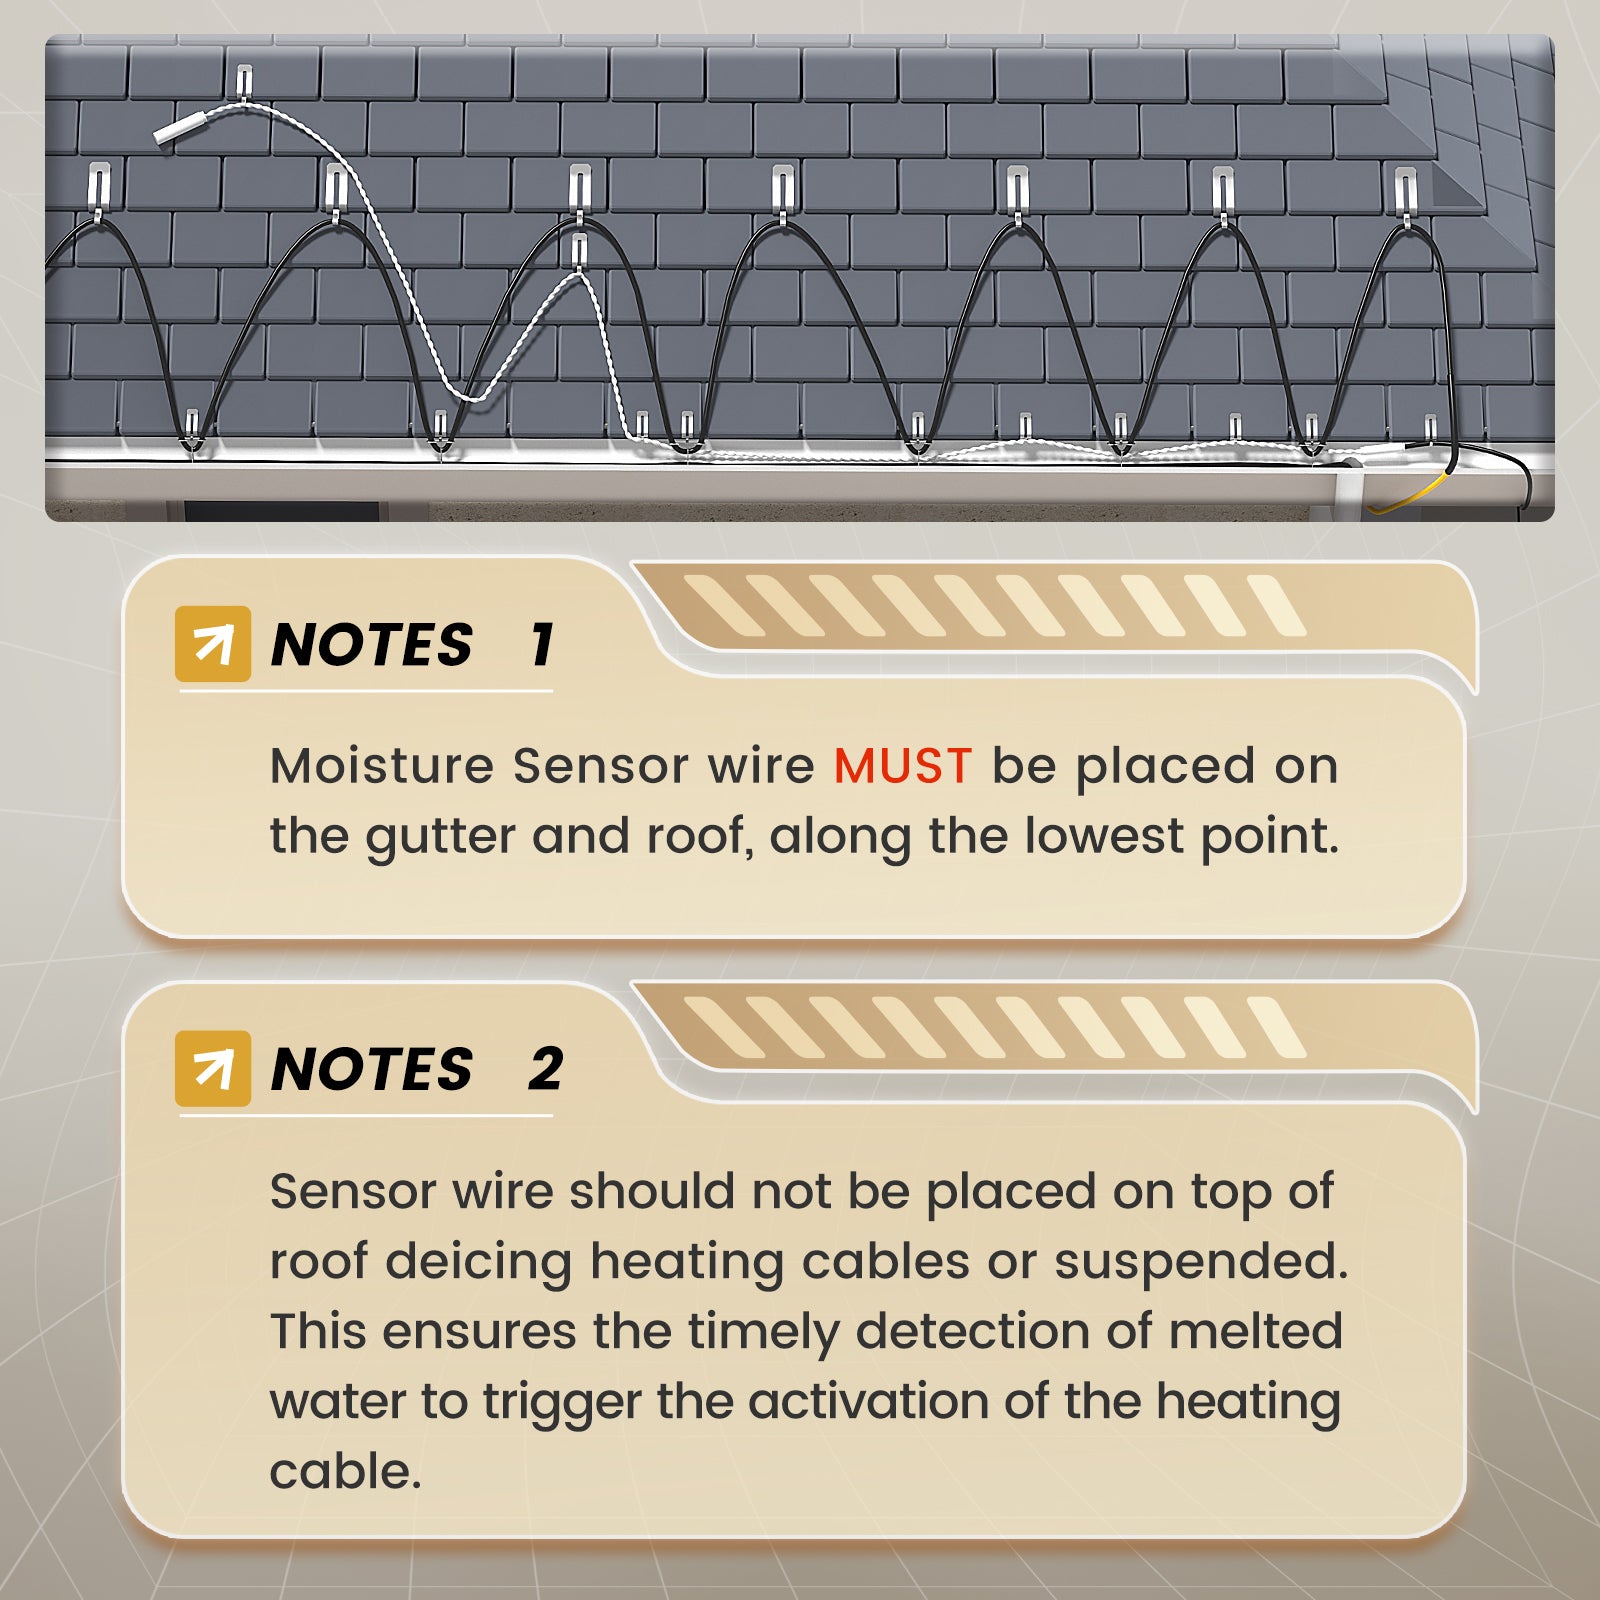
Place it directly on the roof and gutter where meltwater is expected.
Moisture Sensor Placement
- Lay the sensor along the lowest area of the gutter.
- Keep it in contact with the roof or gutter surface.
- Route it where melting snow or ice will create water.
- Extend it at least 2 ft beyond the upper point of one heating-cable triangle.
- Keep it beside the heating cable—not directly on top of it.
- Do not leave the sensor hanging in open air.
- Secure it against movement from sliding snow or ice.
- Do not cut or extend the sensor wire.

Specifications
| Specification | 120V Plug-In | 208–240V Hardwired |
| Product Type | Smart Roof & Gutter De-Icing Controller | Smart Roof & Gutter De-Icing Controller |
| Rated Voltage | 110–120V AC | 208–240V AC |
| Maximum Current | 15A | 15A |
| Maximum Power | 1800W at 120V | 3120W at 208V / 3600W at 240V |
| Power Input | 6 ft cord with grounded plug | 6 ft hardwired leads; no direct plug |
| Heating-Cable Output | Plug-in output receptacle | Hardwired output leads |
| Installation Type | Plug-in | Professional hardwired installation |
| Automatic Activation | Approximately 38°F (3°C) or below with moisture detected | |
| Upper Temperature Limit | Approximately 46°F (8°C) | |
| Control Methods | Automatic Mode, Manual Mode, Smart Life App | |
| WiFi Requirement | 2.4 GHz WiFi network | |
| Wireless Setup | WiFi with Bluetooth-assisted pairing | |
| Moisture Sensor Length | 10 ft | |
| Outdoor Rating | IP65 | |
| Included Hardware | 6 shingle clips, 2 spacers, and 3 mounting screws | |
| Compatible Load | One compatible roof de-icing cable | |

Automatic, Manual and App Control View Modes Hide Modes
Automatic Mode
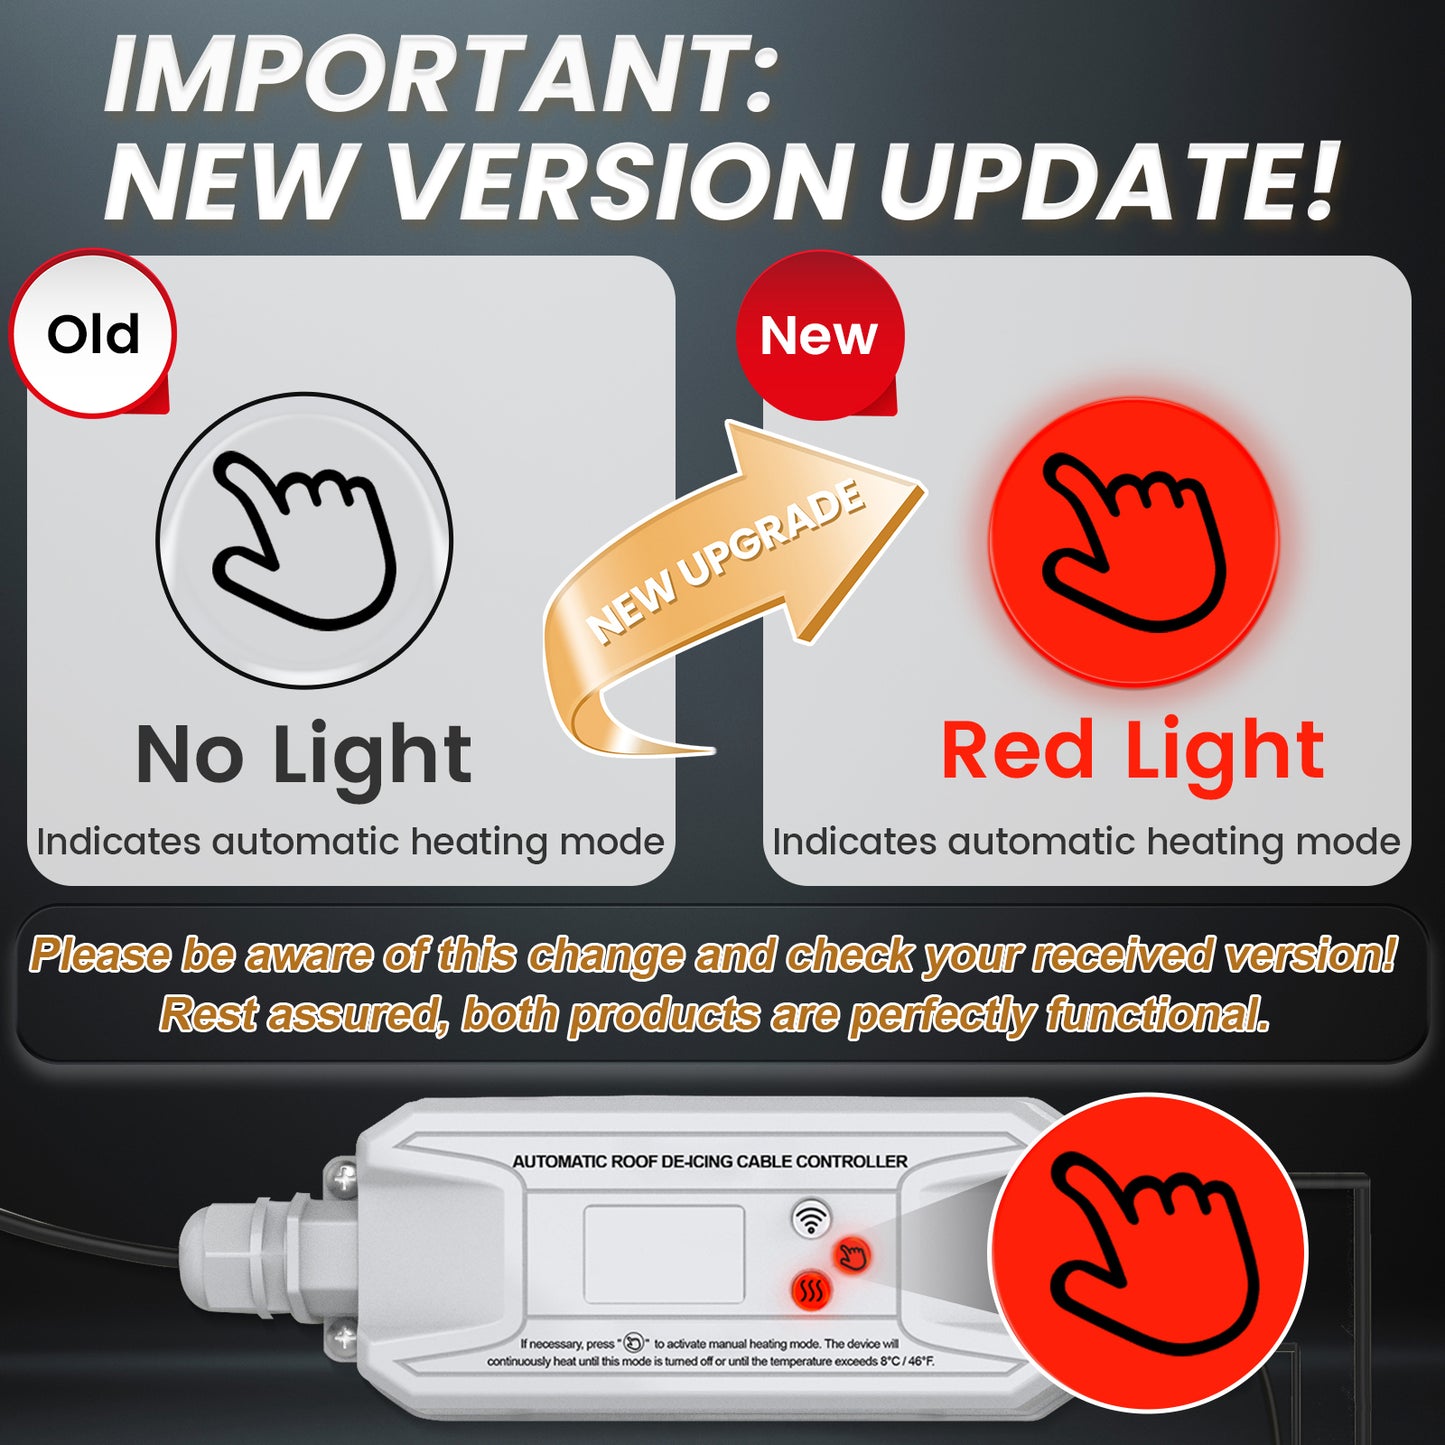
Heating starts when the temperature is about 38°F or below and moisture is detected.
Manual Mode
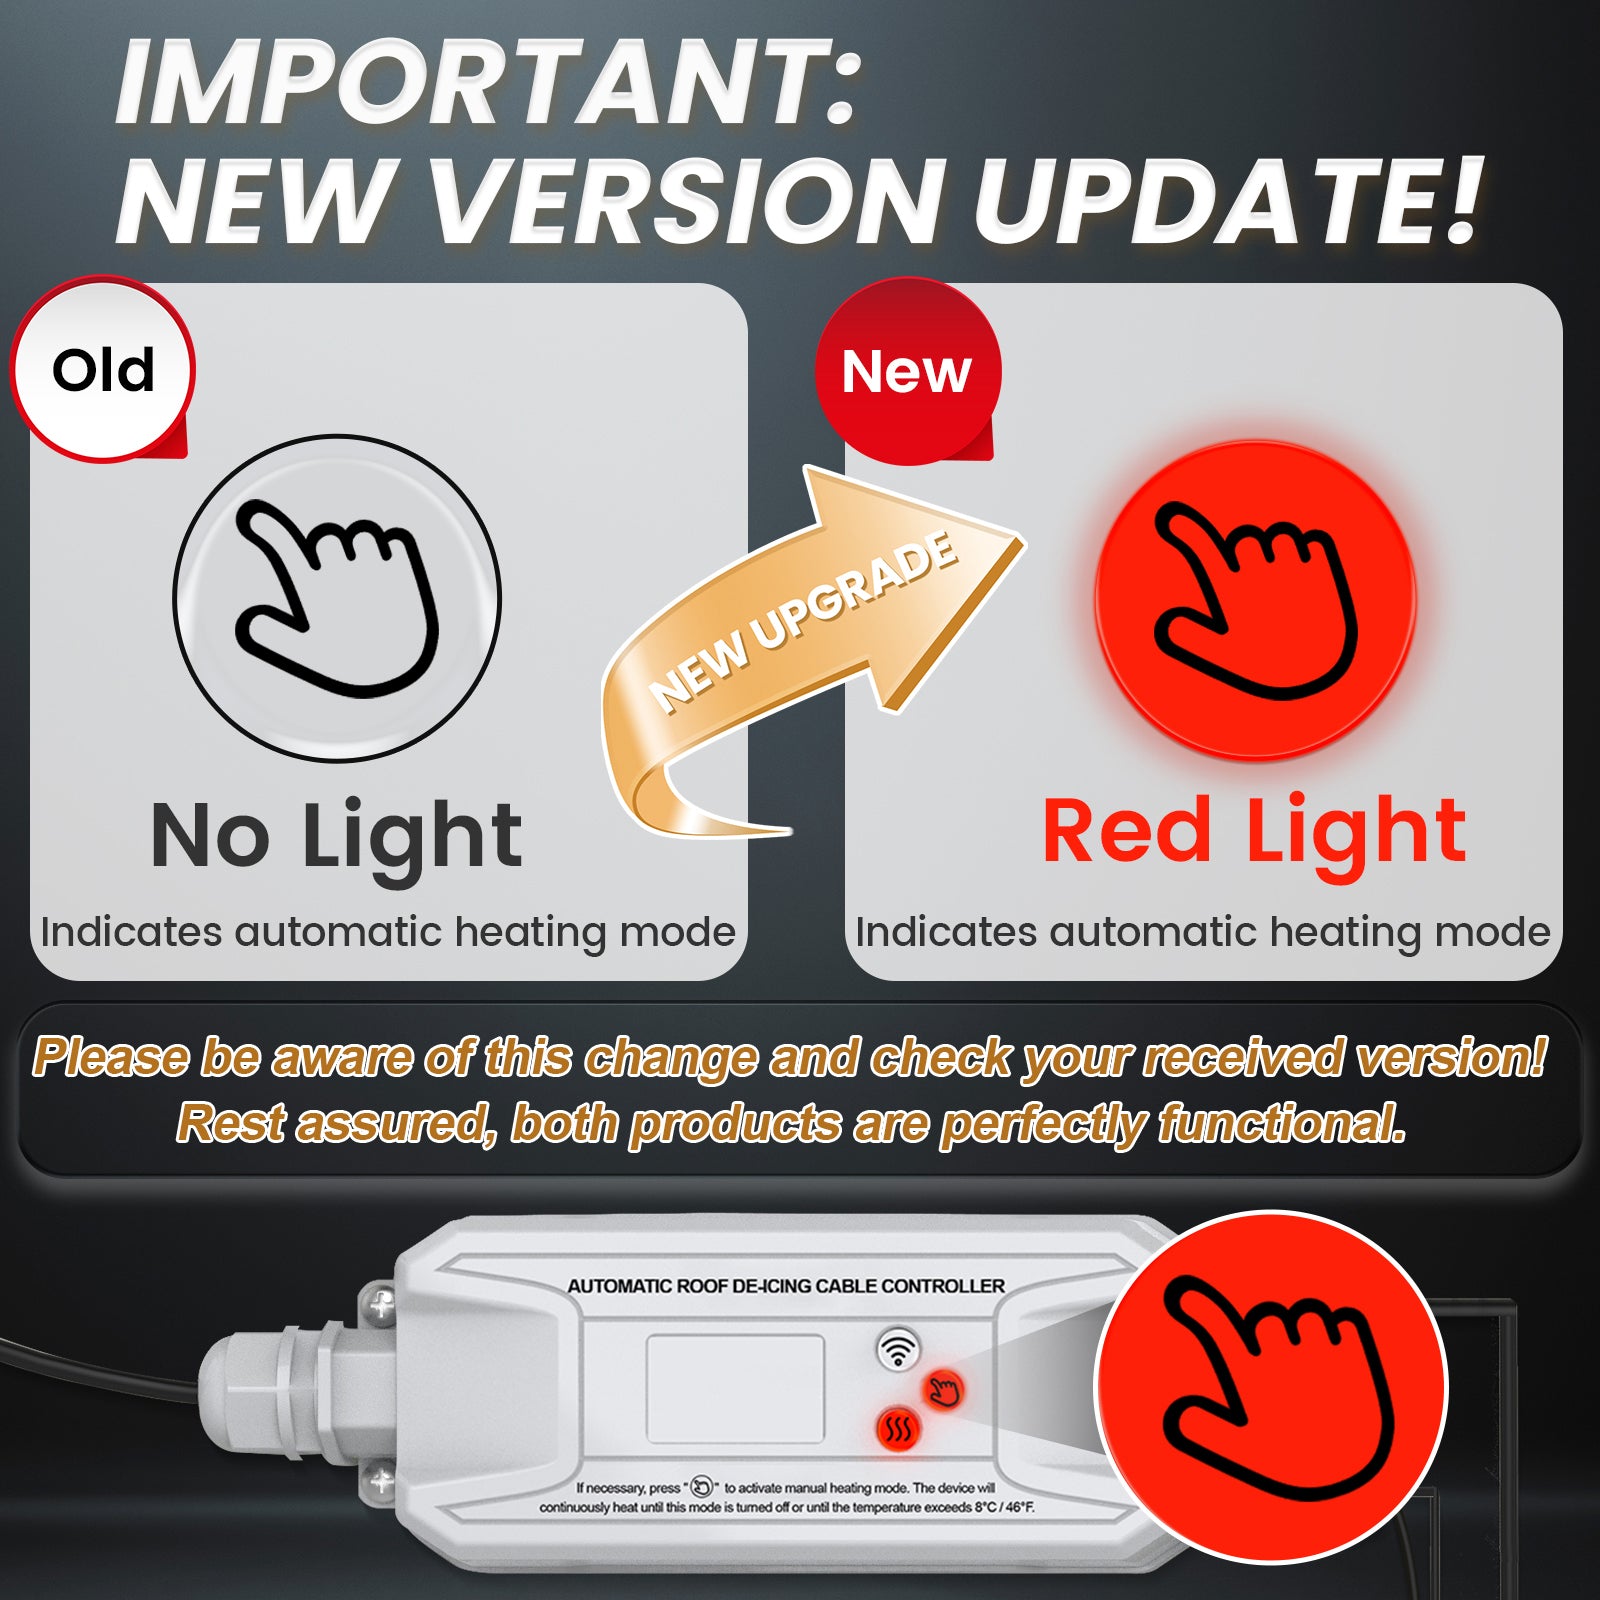
Supplies continuous power until turned off or the temperature exceeds about 46°F.
Smart Life App
Change modes and view temperature, moisture, and heating status remotely.
Understanding Automatic Operation
- Low temperature alone does not start automatic heating.
- The moisture sensor must also detect water.
- Dry snow may not activate the moisture sensor.
- Place the sensor where meltwater reaches it early.
- Use Manual Mode when testing the heating output.
Basic Installation Overview View Steps Hide Steps
Install the roof heating cable before connecting it to the controller.
1. Install the Roof Cable
Follow the heating cable manufacturer’s installation instructions.
2. Mount the Controller
Mount the housing under the eave in a protected outdoor location.
3. Route the Sensor
Place the moisture sensor along the gutter bottom and roof surface.
4. Secure Both Cables
Secure the heating cable and moisture sensor separately.
5. Connect the System
Use the correct procedure for the selected plug-in or hardwired model.
6. Test and Pair
Test the heating output and complete 2.4 GHz WiFi pairing.
120V Plug-In Version
- Confirm that the roof heating cable is rated for 110–120V.
- Confirm that the load does not exceed 15A or 1800W.
- Plug one roof heating cable into the controller.
- Use a properly grounded outdoor outlet.
- Keep the plug and receptacle protected from direct water exposure.
- Provide required ground-fault protection.
208–240V Hardwired Version
- Professional installation is required.
- Confirm the actual supply voltage before wiring.
- Match the controller and roof heating cable voltage.
- Connect L1, L2, and Equipment Ground.
- Do not connect a Neutral conductor to the controller.
- Terminate all input and output leads inside approved enclosures.
- Provide suitable circuit and ground-fault protection.
- Confirm the roof cable remains within its maximum circuit length.
Installation Notes
- Keep the controller and electrical connections protected from direct water.
- Form a drip loop where required.
- Use suitable clips for metal or membrane roofs.
- Protect the sensor from sliding snow and ice.
- Inspect the controller, sensor, cable, clips, and connections before each winter.
Recommended Applications
- Roof edge ice dam prevention
- Roof valley de-icing systems
- Gutter heating cable
- Downspout freeze protection
- Asphalt shingle roof installations
- Compatible metal and membrane roof systems
- Homes, cabins, garages, and small commercial buildings


Frequently Asked Questions
What is the difference between the two voltage options?
The 120V model is plug-in. The 208–240V model requires professional field wiring and has no direct power plug or output receptacle.
Can I plug in the 208–240V version?
No. Both the incoming power and roof-cable output require manual field termination.
Why are there two sensors?
The controller measures outdoor temperature and separately detects moisture from melting snow or ice.
Where should the moisture sensor be placed?
Place it directly on the roof and along the lowest part of the gutter where meltwater is expected.
Can the sensor rest on the heating cable?
No. Keep the moisture sensor beside the heating cable rather than directly on top of it.
Why does the system not start below 38°F?
Automatic Mode also requires detected moisture. Cold and dry conditions will not automatically activate heating.
Can I turn on heating without detected moisture?
Yes. Use Manual Mode. Heating stops when manually turned off or when the temperature exceeds approximately 46°F.
Does it work with 5 GHz WiFi?
No. Smart Life app setup requires a 2.4 GHz WiFi network.
How many heating cables can I connect?
Connect one compatible roof de-icing cable. Do not use splitters to combine multiple cables.
Can the moisture sensor be extended?
No. Confirm that the supplied 10 ft sensor can reach the required roof and gutter areas before installation.
Guides & Resources
Check Before Connecting Power
- Match the controller, roof cable, and supply voltage.
- Keep the total load below 15A.
- Install the roof cable before connecting the controller.
- Mount the controller housing under the eave.
- Place the moisture sensor directly on the roof and gutter.
- Keep the sensor separated from the heating cable.
- Use a 2.4 GHz WiFi network for app setup.
- Use a qualified electrician for the 208–240V version.
Read the complete installation manual before mounting, wiring, or operating the controller.